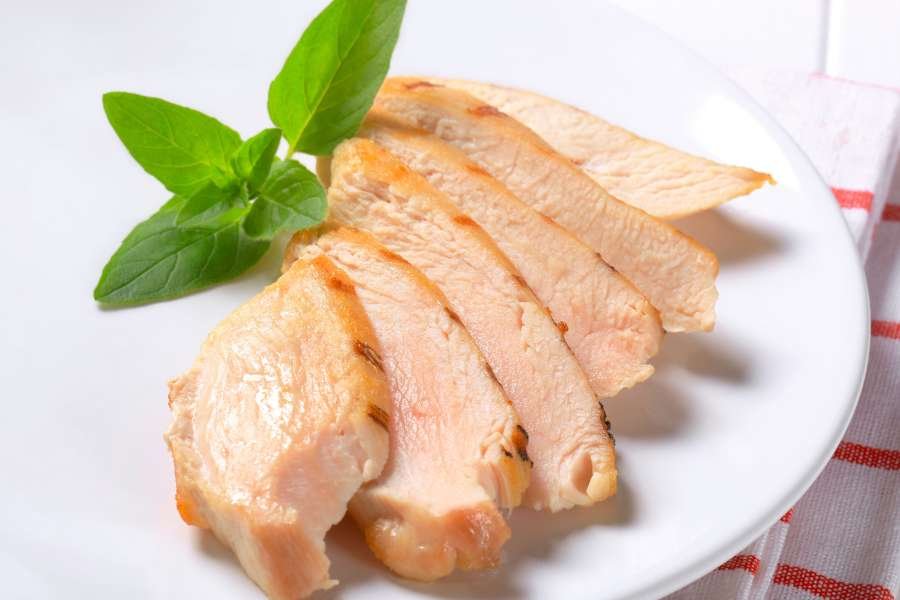
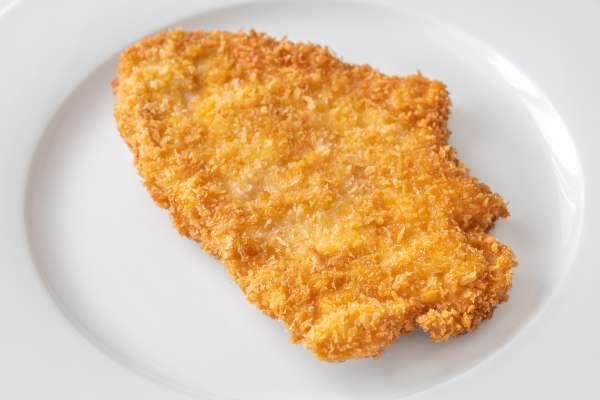
When it involves fast and healthy cooking, thinly sliced bird breasts are a true sport-changer. Their slim profile extensively reduces cooking time, making them the precise answer for busy weeknights whilst each minute counts. Cook Thin Sliced Chicken Breast on Stove. Unlike thicker cuts that require extra endurance and care, skinny slices prepare dinner fast even as nevertheless retaining their juicy tenderness. Their versatility is some other purpose they’ve turn out to be a present day kitchen essential. Whether you are tossing them into a refreshing salad, layering them in a sandwich, or getting ready a hearty main dish, thinly sliced bird breasts adapt effortlessly to a huge range of recipes.
Beyond convenience, they strike the appropriate balance among taste, pace, and vitamins. With their potential to fit seamlessly into diverse cuisines and meal plans, thinly sliced bird breasts have earned their region as a staple for absolutely everyone trying to simplify their cooking without sacrificing flavor.
What You Need to Get Started: Essential Tools and Ingredients
Before the cooking begins, preparation is key. A razor-sIharp chef’s knife or a dedicated meat slicer is vital to achieve those even, thin slices. Don’t forget a sturdy cutting board, a well-seasoned skillet, and a trusty spatula. For the ingredients, fresh chicken breasts are the star of the show, accompanied by olive oil or butter, seasoning, and perhaps a simple marinade of garlic, lemon, or herbs. Armed with these tools and flavors, you’re ready to create a delicious meal.
Choosing the Right Pan: The Best Skillets for Perfectly Cooked Chicken

The skillet you choose is more crucial than you might think. A heavy-bottomed cast iron skillet? It’s your secret weapon for retaining heat and creating that beautiful sear. Prefer easier cleanup? A non-stick pan does the trick. For deeper flavors, reach for stainless steel—perfect for that rich caramelization. No matter your preference, a good skillet is the backbone of any successful dish, turning thin sliced chicken into a golden-brown masterpiece.
Preparing Your Chicken: How to Thin Slice Chicken Breasts Like a Pro

Here’s the secret to slicing chicken like a pro: chill it first. Toss your chicken breasts in the freezer for 10-15 minutes to firm them up, making thin, even slicing a breeze. Then, with your knife angled just so, slice against the grain in one smooth motion. This method keeps the meat tender and uniform, ensuring every bite cooks evenly and comes out juicy.
Marinating Basics: Adding Flavor to Thin Sliced Chicken Breasts
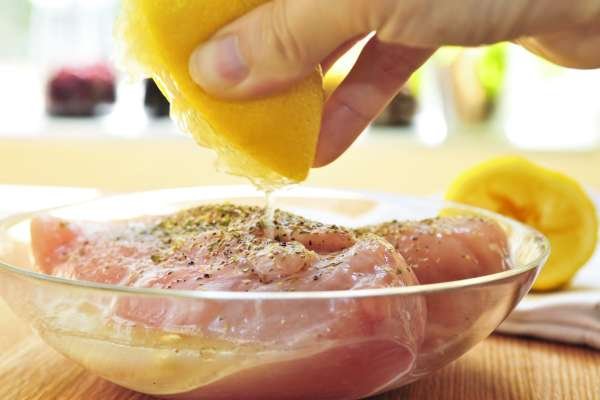
A great marinade can transform chicken into a flavor-packed dish. Begin with olive oil to lock in moisture, then add an acidic element like lemon or vinegar to tenderize. Finish with spices—paprika, cumin, or fresh herbs work wonders. Let the chicken bathe in these bold flavors for at least 30 minutes, or even a few hours, to ensure maximum flavor absorption.
No Time to Marinate? Quick Seasoning Tips for Busy Cooks
Pressed for time? You can still season like a pro. A hearty sprinkle of salt and pepper works wonders. Add an extra punch of flavor by sprinkling on some garlic powder, smoked paprika, or chili flakes. Make sure the seasonings cover both sides of the chicken so that as it cooks, those flavors seep in, making each bite deliciously seasoned.
Preheating the Pan: Why This Step is Key for Juicy Chicken
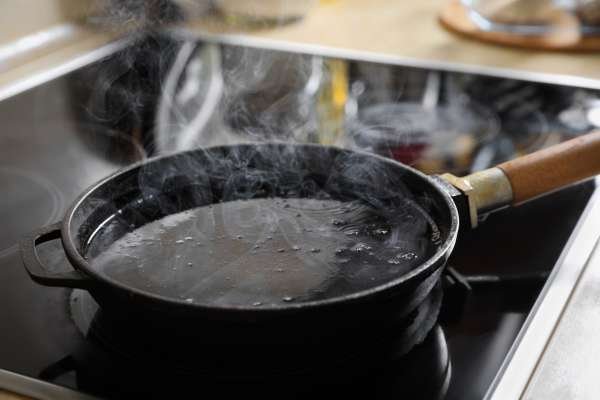
Skipping the preheating step? Big mistake. A properly preheated skillet ensures that satisfying sizzle the second the chicken hits the pan. This creates a crust, seals in the juices, and guarantees a perfectly moist chicken breast. For best results, heat the pan over medium-high for a few minutes before adding oil or butter.
Using Oil or Butter? Understanding the Best Cooking Fats for the Job
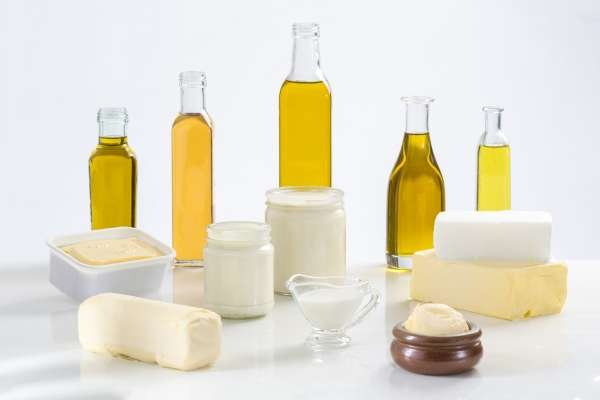
Deciding between oil or butter? It depends. Olive oil gives a lighter, earthier taste and has a higher smoke point, perfect for quick cooking. Butter? It enhances the dish with a rich, slightly nutty flavor. Why not use both? Start with olive oil to get the cooking started, then add a pat of butter for depth and deliciousness.
How to Achieve the Perfect Sear: Getting a Golden Brown Crust on Thin Chicken
Achieving a flawless sear is all about patience. Place the chicken in the pan and let it cook undisturbed for a full 2-3 minutes on each side. This allows for caramelization—a process that gives you that rich, golden crust while locking in all the juices for an incredibly tender bite.
Cooking Time for Thin Sliced Chicken Breast: The Ideal Duration for Tender Meat
Thin slices mean quicker cooking. On medium heat, you’ll only need about 2-3 minutes per side. Overcooking is the enemy, so be sure to keep a close watch. To be safe, check for an internal temperature of 165°F to ensure doneness while maintaining that juicy, tender texture.
How to Tell When Thin Sliced Chicken Breast is Done: Visual and Temperature Cues

Keep an eye out for these key signs: the outside should be golden, and the juices should run clear. No meat thermometer? No worries—if the chicken feels firm to the touch and shows no pink inside, it’s fully cooked. Just be cautious not to overcook to prevent dryness.
Avoiding Dryness: Tips to Keep Your Chicken Juicy
Nobody wants dry chicken. The secret? Don’t overcook and keep the heat steady. Lower the temperature after the initial sear and cover the pan. This traps moisture and helps keep your chicken juicy. Also, allow the meat to rest before serving, so the juices redistribute evenly.
Cooking Without a Thermometer: Easy Ways to Ensure Doneness
If you lack a thermometer, no worries. Gently press the thickest part of the chicken—it should feel firm but not overly hard. Cut into the meat to ensure the juices run clear. These small tests help ensure perfectly cooked, juicy chicken.
Flip or Not to Flip: The Right Time to Turn Your Chicken Breast
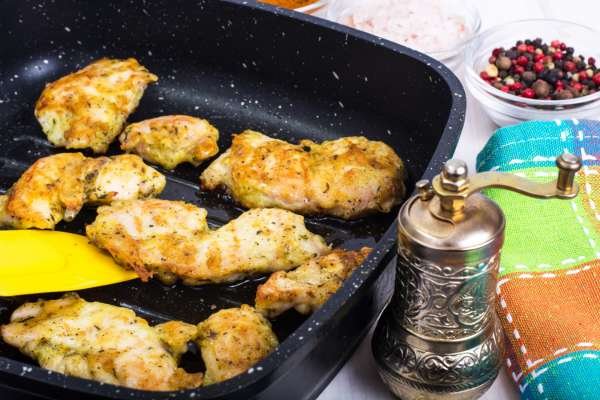
Flipping at the right moment is key. Once the edges start turning opaque and the bottom is golden brown, it’s time. This generally takes around 2-3 minutes. Avoid flipping too soon, as it can disrupt the searing process and cause uneven cooking.
Resting the Chicken: Why Letting It Sit Makes a Difference
Once your chicken is cooked, patience is required. Allow the chicken to rest for 5 minutes before cutting into it. This resting time lets the juices redistribute, ensuring a more tender and flavorful dish. Cutting too soon leads to dry meat, so give it a moment to settle.
Adding Sauces While Cooking: How to Infuse More Flavor

Amp up the flavor by creating a quick pan sauce. After cooking the chicken, deglaze the pan with broth, wine, or lemon juice. Scrape up the browned bits and reduce the liquid until it becomes a rich, savory sauce to drizzle over your chicken for added complexity.
Stovetop to Oven Method: For Extra Tenderness and Crispiness
Want that perfect balance of tenderness and crispiness? Start your chicken on the stove, then transfer it to the oven at 400°F for 5-7 minutes. This finishing step ensures even cooking and enhances flavor—especially if you’ve added sauce or veggies.
Creative Add-ons: Cooking Thin Chicken with Vegetables, Herbs, and More
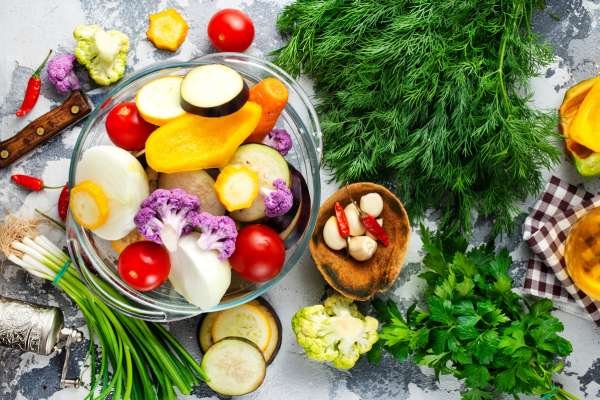
Why stop at just chicken? Toss in some thinly sliced garlic, fresh rosemary, or sautéed spinach for extra flavor. Add bell peppers, mushrooms, or zucchini to the skillet for a one-pan meal that’s as healthy as it is tasty.
Serving Suggestions: What to Pair with Your Thin Sliced Chicken Breast
Complete your meal with sides that complement the chicken’s lightness. Think fresh salads, roasted veggies, or fluffy rice. For a heartier option, creamy mashed potatoes or pasta paired with a simple lemon-butter sauce works beautifully.
Common Mistakes to Avoid When Cooking Thin Sliced Chicken Breast
Avoid overcrowding the pan, which leads to steaming instead of searing. Always preheat your pan to ensure even cooking. And remember, less is more when it comes to seasoning—don’t overwhelm the delicate flavor of the chicken.
Cleaning Up After Cooking: Easy Tips for a Tidy Kitchen
After a delicious meal, cleanup shouldn’t be a hassle. Soak your skillet to loosen up any stuck-on bits. Wipe down your counters as you go, and restore the shine to your appliances with a microfiber cloth. A clean kitchen is the mark of a seasoned cook.
Wrapping Up: Mastering the Art of Cooking Thin Sliced Chicken Breast on Stove
With the right techniques and a bit of patience, thinly sliced chicken breast can be your go-to for quick, healthy meals. Keep these tips handy, and you’ll soon be cooking up juicy, flavorful chicken like a pro. Happy cooking!