Bake Thin Sliced Chicken Breast may sound simple, but it’s easy to overcook and dry out if you don’t get the timing just right. Whether you’re prepping a quick dinner or meal-prepping for the week, knowing the correct bake time and temperature can make all the difference between juicy, flavorful chicken and something that feels more like a rubber sole. This guide walks you through everything you need to know to confidently bake thin sliced chicken breasts that come out tender and delicious every time.
Why Thin Sliced Chicken Breast Is a Weeknight Hero
Thin sliced chicken breast is every busy cook’s best friend. It cooks faster, absorbs flavor more easily, and is incredibly versatile. Whether you’re tossing it into salads, layering it in sandwiches, or serving it with rice and veggies, it adapts to nearly any dish. And since it requires less time in the oven, it’s perfect for weeknight meals when you want something healthy and satisfying without spending an hour in the kitchen.
The Perfect Thickness: What Counts as “Thin Sliced”?
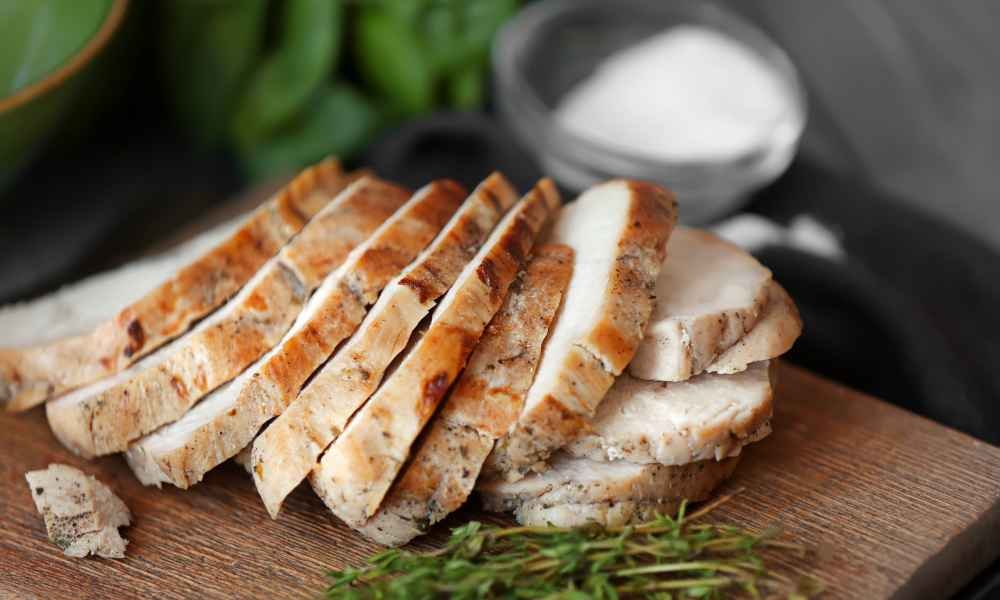
When we talk about thin sliced chicken breast, we’re typically referring to pieces that are about ¼ to ½ inch thick. These can be achieved by either slicing a regular chicken breast horizontally or buying pre-sliced cuts. Getting a consistent thickness is important—not only for even cooking but also for achieving the ideal texture. Uneven slices can lead to dry edges and undercooked centers, so aim for uniform cuts whenever possible.
The Science Behind Baking Chicken: Why Timing Matters
Chicken breast is lean and lacks the fat that makes other cuts more forgiving when overcooked. That’s why timing is crucial. Thin pieces cook much faster than their thicker counterparts and can dry out quickly. Baking relies on gentle, even heat, which is great for preserving moisture—but only if you know exactly how long to leave the chicken in the oven. A few minutes too long can turn your meal into a chewy disappointment.
Oven Temperature vs. Cooking Time: Finding the Right Balance
The hotter the oven, the faster your chicken will cook—but that doesn’t always mean better. A high temperature might give you a golden crust but can also dry out the meat if you’re not careful. On the flip side, a lower temperature allows for more even cooking but takes more time and may not brown the chicken as nicely. Balancing the two is key. Preheating the oven is non-negotiable; it ensures your chicken cooks evenly from the start.
How Long to Bake Thin Sliced Chicken Breast at Different Temperatures
350°F:
At 350°F, thin sliced chicken breast will typically take about 25 to 30 minutes to cook through. This lower temperature is gentle on the meat, helping it retain moisture. If you have time and want a very tender result, this is a safe bet—just make sure to cover the chicken with foil to lock in moisture.
375°F:
Baking at 375°F offers a great middle ground between speed and moisture retention. Thin sliced chicken will usually be done in about 20 to 25 minutes. You may want to flip the pieces halfway through for even browning. This temperature is perfect for recipes where you’re adding marinades or sauces.
400°F:
If you’re in a hurry, 400°F is your go-to. Chicken breasts sliced thin will cook in just 15 to 20 minutes. This higher heat helps develop a nice golden crust, especially if you brush the chicken with a bit of oil. Just be cautious and watch closely toward the end—this is where overcooking can sneak up on you.
425°F:
At 425°F, your thin sliced chicken breasts could be ready in as little as 12 to 15 minutes. This is ideal for quick dinners but requires close monitoring. Consider using a meat thermometer to ensure the internal temperature hits 165°F without going over. You get the benefit of speed, but the margin for error is much smaller.
Bone-In vs. Boneless: Does It Change the Baking Time?
Yes, the presence of bones significantly affects baking time. Bone-in chicken takes longer to cook than boneless because bones act as insulation, slowing down the heat transfer to the center of the meat. However, when it comes to thin sliced chicken breasts, they’re almost always boneless. If you happen to be working with bone-in thin cuts—which are less common—add an extra 5–10 minutes to your baking time, and always use a meat thermometer to make sure the internal temperature reaches 165°F. For most people using standard boneless thin slices, the shorter cook time is one of the main advantages.
Fresh vs. Frozen Chicken Breast: What You Need to Know Before You Bake
Using frozen chicken directly in the oven isn’t ideal for thin sliced cuts. Frozen chicken can cook unevenly, leading to parts that are overcooked and others that remain underdone. For best results, always thaw your chicken breasts fully before baking. You can defrost them in the fridge overnight or use the cold water method for quicker results. Once thawed, pat the chicken dry to ensure the seasonings stick well and to avoid steaming in the oven. Fresh or fully thawed chicken also bakes more evenly and produces better texture and flavor.
Simple Seasoning Ideas That Add Big Flavor
One of the best things about thin sliced chicken breasts is how well they take on flavors. A quick sprinkle of salt, black pepper, garlic powder, and paprika is often enough to make your chicken pop with flavor. For something zesty, add a splash of lemon juice or some dried herbs like oregano, thyme, or rosemary. If you’re feeling bold, try chili flakes, cumin, or a dash of cayenne for a spicy kick. The key is to keep it simple and let the natural flavor of the chicken shine through.
Marinating Tips to Keep Your Chicken Moist and Tasty
Marinating thin sliced chicken breast is an excellent way to boost flavor and lock in moisture. Since the slices are thin, they don’t need long to absorb the marinade—30 minutes to 2 hours is usually plenty. Use a marinade with a balance of acid (like vinegar, citrus juice, or yogurt), oil, and seasonings. Avoid over-marinating in acidic ingredients, as it can break down the meat too much and cause a mushy texture. Always pat off excess marinade before baking to prevent steaming and ensure a proper bake.
Step-by-Step: How to Bake Thin Sliced Chicken Breast in the Oven
Preheat the Oven
Start by preheating your oven to the desired temperature—375°F is a great all-purpose choice for juicy, evenly cooked chicken. Preheating ensures that the chicken starts cooking right away, sealing in moisture and helping achieve an even texture.
Prepare the Chicken
If your chicken is thicker than desired, use a meat mallet to gently pound it to an even ¼ to ½ inch thickness. Trim off any excess fat or connective tissue, and pat the chicken dry with a paper towel to help the seasonings stick better.
Season or Marinate
Decide whether you’ll season the chicken directly or use a marinade. For quick seasoning, sprinkle your preferred blend of spices and herbs on both sides. If marinating, place the chicken in a sealed bag or dish and refrigerate it for at least 30 minutes.
Arrange on a Baking Sheet
Line a baking sheet with parchment paper or lightly grease it with oil. Lay the chicken pieces flat in a single layer with space between each one. This promotes even cooking and allows hot air to circulate properly around the meat.
Bake to Perfection
Place the baking sheet in the preheated oven. Bake the chicken for 15 to 25 minutes depending on your oven temperature and slice thickness. Higher temperatures cook faster but require more attention to avoid drying out.
Check for Doneness
The best way to know if your chicken is done is to use a meat thermometer. Insert it into the thickest part of the slice—when it reads 165°F (74°C), it’s ready. If you don’t have a thermometer, cut into one piece and ensure the juices run clear and the center is no longer pink.
Different Cooking Methods Compared: Is Baking Really the Best?
Baking
Baking is often the go-to method for cooking thin sliced chicken breasts, especially for beginners. It’s hands-off, easy to monitor, and great for achieving even doneness without a lot of fuss. When done right, baking locks in moisture and allows flavors to develop slowly, resulting in juicy, flavorful chicken that pairs well with any side.
Pan-Searing and Finishing in the Oven
This method adds an extra layer of flavor by giving the chicken a golden-brown crust from the sear. Start by pan-searing each side for 1–2 minutes, then transfer to a preheated oven to finish cooking. This combination brings the best of both worlds—crispy outside, tender inside—but requires a bit more attention and experience.
Broiling
Broiling cooks chicken very quickly under high, direct heat. It’s ideal for adding a nice char or crispy top layer. However, it’s easy to overcook thin slices using this method, so constant supervision is necessary. If you’re confident and craving a slightly grilled texture, broiling can be effective.
Air Frying
Air fryers have become a favorite for many home cooks, and for good reason. They cook thin sliced chicken breast quickly and evenly, with a slightly crispy exterior—all without added oil. It’s a healthier alternative to frying and a faster option than baking. Just be sure not to overcrowd the basket.
How to Use Foil, Parchment, or a Rack When Baking Chicken
Using foil or parchment paper when baking chicken makes cleanup easier and prevents the meat from sticking to the pan. Foil can also be used to wrap chicken for a more steamed effect, locking in juices. A baking rack allows air to circulate beneath the chicken, promoting even cooking and preventing sogginess. Each option offers a different benefit, so it depends on the texture and style you’re aiming for. For the juiciest chicken, baking on foil or parchment in a single layer is usually the safest bet.
How to Know Your Chicken Is Fully Cooked Without Drying It Out
The most reliable way to tell if your chicken is fully cooked is by using a meat thermometer. Insert it into the thickest part—if it reads 165°F (74°C), you’re good to go. If you don’t have a thermometer, cut into the thickest slice and check that the juices run clear and there’s no pink in the center. Be careful not to rely solely on time—ovens vary, and thin chicken can go from perfect to overdone in just a couple of minutes.
What to Serve with Baked Thin Sliced Chicken Breast
Baked thin sliced chicken is a versatile protein that pairs well with a variety of sides. For a healthy meal, consider roasted vegetables, steamed broccoli, or a fresh garden salad. For something heartier, try mashed potatoes, rice pilaf, or creamy pasta. You can also slice the chicken over a grain bowl or tuck it into wraps or sandwiches. The mild flavor of baked chicken makes it an ideal match for bold sauces and side dishes alike.
Tips to Store and Reheat Leftovers Without Losing Moisture
To keep baked chicken leftovers juicy, store them in an airtight container in the refrigerator for up to 3–4 days. When reheating, avoid the microwave if possible—it tends to dry out the meat. Instead, reheat in a covered skillet over low heat or in the oven wrapped in foil at 300°F until warmed through. Adding a splash of chicken broth or water before reheating can help revive lost moisture.
Common Mistakes to Avoid When Baking Thin Sliced Chicken
One of the biggest mistakes is overbaking. Thin sliced chicken doesn’t need long in the oven, and every extra minute increases the chance of dryness. Another common error is skipping the preheat, which can lead to uneven cooking. Avoid overcrowding the pan, which causes steaming rather than roasting. Lastly, not checking doneness with a thermometer can lead to guesswork that often results in dry chicken or undercooked centers.
Troubleshooting: Why Your Chicken Came Out Rubbery or Dry
Rubbery or dry chicken usually means it was overcooked or cooked at too high a temperature. If your oven runs hot, even baking at 400°F could be too aggressive. Uneven slicing can also cause thin ends to dry out while thicker parts remain underdone. Using a meat thermometer helps avoid both problems. For rubbery texture, another culprit might be skipping a marinade or failing to rest the meat after baking—this step allows the juices to redistribute.
Final Thoughts
Mastering how long to bake thin sliced chicken breast is all about timing, temperature, and technique. With the right approach, you can achieve perfectly tender, flavorful chicken every time—without the stress or guesswork. Whether you’re a beginner or just looking to simplify weeknight dinners, this method is your ticket to a quick, healthy, and satisfying meal.