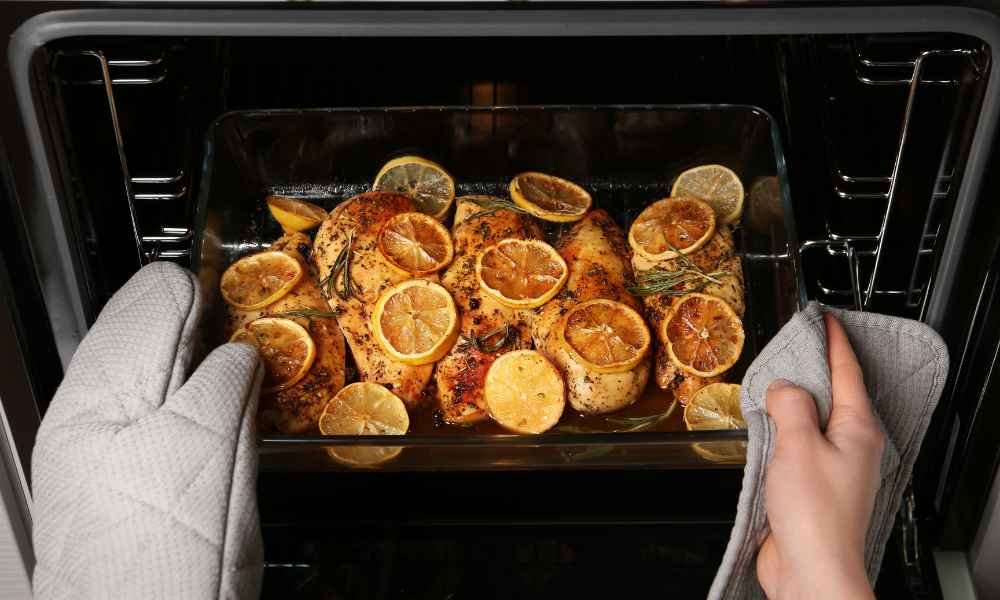
Thin Sliced Chicken Breast Oven Time, timing is everything. Typically, thin slices—about ¼ inch thick—should bake for 15 to 20 minutes at 400°F (200°C). The exact time can vary depending on your oven and the thickness of the slices. A food thermometer is the safest way to confirm doneness—you’re aiming for an internal temperature of 165°F (74°C). Keeping a close eye on the clock ensures the chicken comes out juicy and tender instead of dry and rubbery.
Understanding the Importance of Proper Oven Time for Thin Chicken Slices
Thin sliced chicken breasts cook quickly, which is great for busy schedules but risky if you’re not careful. Underbaking can leave chicken unsafe to eat, while overbaking makes it tough and flavorless. Because these slices are so delicate, even 2-3 minutes too long in the oven can change the texture completely. That’s why knowing the ideal oven time helps you consistently serve safe, delicious meals.
Why Thin Sliced Chicken Breast Is a Weeknight Dinner Hero
One of the biggest reasons thin sliced chicken breasts are a favorite for weeknight dinners is their quick cook time. You don’t need to marinate them for hours or preheat the oven forever. Within 30 minutes—including prep and cook—you can have a protein-packed main course on the table. Their versatility also makes them ideal for adding to salads, pastas, wraps, or enjoying with a side of roasted vegetables.
The Role of Thickness: How Slice Size Affects Cooking Time
Even within the “thin” category, thickness makes a difference. A slice that’s 1/8 inch thick may only need 12–14 minutes, while ½ inch slices could take up to 22 minutes. Uniform slicing is key. If some pieces are thicker than others, they’ll cook unevenly—some might be overdone while others are still pink in the center. Using a meat mallet or slicing chicken breasts evenly by hand helps prevent this issue.
Best Oven Temperatures for Baking Thin Sliced Chicken Breast
A consistent oven temperature of 400°F strikes the right balance between cooking the chicken quickly and keeping it juicy. At lower temperatures like 350°F, the slices will take longer and may dry out. Higher temps like 425°F are doable but require careful monitoring. Using convection ovens can reduce cook time slightly due to better air circulation, but always verify the internal temperature to ensure safety.
Signs Your Thin Chicken Breast Is Perfectly Cooked
The clearest sign your chicken is ready is an internal temperature of 165°F. Beyond that, the juices should run clear when sliced, and the color should be white throughout, with no pink in the center. The surface will have a slight golden hue, and the texture will be firm but still moist. If you press on it with a fork, it should spring back slightly rather than feel rubbery or mushy.
How to Avoid Overcooking and Dry Chicken in the Oven
Overcooked chicken is sadly common, especially when using thin cuts. To avoid dryness, cover the chicken loosely with foil during baking or add a small amount of broth or olive oil to the baking dish to maintain moisture. You can also marinate the slices beforehand to lock in flavor and tenderness. Lastly, always remove the chicken from the oven as soon as it hits 165°F—carryover heat will continue to cook it slightly after removal.
Oven-Baked vs. Pan-Seared: Which Method Wins for Thin Chicken?
While pan-searing gives a nice crust and quicker cook time, oven-baking wins for its ease, especially when preparing larger batches. You can season, lay the slices flat on a baking sheet, and let the oven do the work—hands-free. There’s less risk of burning, and you can control the internal temperature more easily. However, if you want maximum flavor and a golden-brown sear, finishing the baked chicken with a quick pan-sear can offer the best of both worlds.
Step-by-Step Guide to Baking Thin Sliced Chicken Breast
Baking thin sliced chicken breast in the oven is simple and rewarding if you follow a few key steps. This method ensures your chicken comes out juicy, flavorful, and safely cooked every time. From prep to plating, each stage of the process plays an important role in the final result.
Prepping Your Chicken for Even Cooking
Start by ensuring your chicken slices are uniform in thickness—about ¼ inch is ideal. If they’re uneven, use a meat mallet to gently pound them to the same level. This helps every piece cook at the same rate, avoiding a mix of undercooked centers and overdone edges. Once trimmed and flattened, pat them dry with a paper towel to help the seasonings stick better.
Seasoning Tips That Add Big Flavor
Seasoning is what transforms plain chicken into a delicious dish. You can keep it simple with salt, pepper, garlic powder, and paprika, or use spice blends like Italian seasoning, Cajun rubs, or lemon-pepper. For extra flavor, marinate the chicken for 30 minutes before baking, but if you’re short on time, even a quick rub with olive oil and herbs makes a big difference. Don’t forget to season both sides evenly.
How to Arrange on the Baking Sheet for Best Results
Lay the chicken slices flat on a baking sheet lined with parchment paper or lightly greased foil. Give each piece space—overlapping leads to uneven cooking and steaming instead of baking. For best results, use a rimmed baking sheet and avoid stacking pieces. If you’re cooking a large batch, use two trays rather than crowding one.
Monitoring the Cooking Time and Temperature
Preheat your oven to 400°F (200°C) before placing the chicken inside. Thin sliced chicken generally bakes in 15 to 20 minutes, depending on thickness. Check progress around the 12-minute mark. Use a meat thermometer to confirm that the thickest part of the chicken has reached 165°F (74°C). For added juiciness, you can cover the chicken with foil for the first half of baking, then uncover to finish.
Different Types of Thin Sliced Chicken and Their Cooking Needs
Not all thin sliced chicken breasts are the same, and the type you use can affect cooking time and preparation.
Skinless Boneless Breasts
This is the most common and easiest type to bake. Since there’s no skin or bone, they cook faster and evenly. They’re great for fast meals and absorb seasonings well. Just be sure to monitor closely, as they dry out quickly if overcooked.
Marinated or Pre-Seasoned Cuts
These often come ready to bake, which is convenient, but you should still check the sodium content and adjust any extra seasoning. Because of the added moisture from marinades, you might need to extend the baking time slightly—by 2–3 minutes—depending on how wet the slices are.
Frozen vs. Fresh Thin Chicken
Frozen thin slices must be thawed completely before baking for even results. Baking straight from frozen can result in undercooked centers and rubbery edges. Thaw in the fridge overnight or use the defrost setting on your microwave. Once thawed, pat dry to remove excess moisture and proceed with your seasoning and baking steps.
Best Marinades and Rubs to Enhance Flavor Without Adding Time
You don’t need hours of marinating to make thin sliced chicken breast taste amazing. Quick marinades with acidic elements like lemon juice, vinegar, or yogurt can add punchy flavor and help tenderize the meat in as little as 20 minutes. A simple olive oil, garlic, and herb mix can work wonders, especially when you’re short on time. Dry rubs are even faster—combine spices like smoked paprika, cumin, chili powder, and a pinch of brown sugar for a bold crust that seals in flavor during baking. Whether you go wet or dry, season generously for the best results.
Tools That Help You Bake Chicken Perfectly Every Time
A few kitchen tools can transform your oven-baked thin chicken from average to excellent. A meat thermometer is your best friend—it ensures you never overcook or undercook your slices. A rimmed baking sheet with parchment paper or foil makes cleanup a breeze and prevents sticking. If you want extra crisp edges, a wire rack over the sheet lets air circulate under the chicken. And for perfectly even slices, a sharp chef’s knife or meat mallet ensures consistency in thickness, which is key for uniform cooking.
How to Meal Prep with Thin Sliced Chicken Breast from the Oven
Thin sliced chicken breast is a meal prep MVP. After baking a batch, you can portion it out into containers for the week, pairing it with grains, vegetables, or salads. It’s incredibly versatile—use it in wraps, sandwiches, stir-fries, or pasta dishes. Just slice or shred once cooled, and store in airtight containers in the fridge for up to 4 days. For added convenience, freeze portions for longer storage, and reheat as needed with a splash of broth or sauce to keep it moist.
Creative Recipe Ideas Using Oven-Baked Thin Chicken Slices
Once your chicken is baked, the possibilities are endless. Make a chicken Caesar wrap with romaine, parmesan, and light dressing. Dice it into a Mediterranean quinoa bowl with olives, cucumbers, and hummus. Turn it into BBQ chicken flatbread by topping naan with sauce, cheese, and red onions. Or go simple with garlic-herb chicken over rice and steamed veggies. The mild flavor of thin chicken breasts makes them a blank canvas for dozens of creative meals.
What to Serve with Oven-Baked Thin Sliced Chicken for a Complete Meal
To round out your meal, pair thin sliced chicken with balanced sides. Roasted vegetables like carrots, broccoli, or sweet potatoes are easy and nutritious. Grain options like brown rice, couscous, or quinoa add fiber and fill you up. If you want something light, a fresh salad with vinaigrette is always a winner. For comfort food nights, consider mashed potatoes or mac and cheese. And don’t forget sauces—pesto, tzatziki, or honey mustard can elevate even the simplest chicken.
Troubleshooting Guide: Common Mistakes When Baking Thin Chicken
One common mistake is not checking the chicken’s internal temperature, which leads to dryness or unsafe undercooking. Always aim for 165°F in the thickest part. Another issue is overcrowding the baking tray—this causes steaming instead of roasting. Also, baking straight from the fridge without letting the meat come closer to room temperature can cause uneven cooking. Lastly, skipping seasoning or using dull spices can result in bland chicken, so don’t be afraid to season generously.
How to Store and Reheat Thin Sliced Chicken Without Drying It Out
Proper storage starts with cooling the chicken completely before refrigerating it in airtight containers. To retain moisture during reheating, cover slices with a damp paper towel and microwave in short bursts. Alternatively, reheat in the oven at 325°F covered with foil and a spoonful of broth or water. Avoid high heat, which toughens the meat. If you plan to use it in salads or cold dishes, simply slice and serve without reheating.
Final Tips
Mastering thin sliced chicken breast oven time comes down to prep, timing, and temperature. Keep your slices uniform, season well, and never skip the thermometer. Give each piece room to bake properly, and don’t be afraid to experiment with new spices or sides. With these tips, your baked thin chicken will turn into a go-to meal—easy, quick, and always satisfying.