
Adding a dishwasher in your kitchen is greater than a contemporary convenience—it’s a transformative upgrade that saves time, reduces water usage, and complements your home’s capability. Whether you’re tired of hand-washing countless stacks of dishes or you are reworking and need to deliver your kitchen up to date, putting in a dishwasher can make everyday lifestyles relatively less difficult. From selecting the proper form of unit to understanding plumbing and electric wishes, the method can appear overwhelming in the beginning. But with the proper steering and practise, even novices can tackle this mission confidently. In this complete manual on a way to upload a dishwasher to a kitchen, you’ll find out the entirety you want to recognize—from making plans and setup to smart upkeep recommendations—so you can experience a cleanser, more efficient kitchen with minimum hassle.
Understanding the Basics: Why Add a Dishwasher to Your Kitchen
Adding a dishwasher in your kitchen isn’t just about luxury—it’s a smart, time-saving, and energy-green improve. With contemporary fashions boasting high-overall performance cleaning, water conservation, and electricity-saving features, dishwashers now provide both convenience and sustainability. They lessen the time spent on repetitive cleaning obligations and make certain that your dishes are thoroughly sanitised. Whether you are dealing with a busy family or virtually seeking to streamline your habitual, a dishwasher is a precious addition that enhances the general functionality of your kitchen.
Assessing Your Kitchen Space for a Dishwasher Installation
Before you make a purchase or schedule an installation, it’s essential to assess your kitchen’s layout. Start by identifying whether you have a 24-inch-wide cabinet space—standard for most dishwashers—or if modifications will be necessary. Also, check the proximity to your sink, as dishwashers work best when close to existing plumbing. Look under the sink to see if there’s room for the additional connections. If you’re working with a smaller kitchen, you may need to consider compact or alternative models. Adequate space planning avoids costly surprises during installation.
Choosing the Right Spot: Where Should Your Dishwasher Go?
The perfect region for a dishwasher is adjoining to the sink. This permits for smooth plumbing access and efficient workflow when rinsing and loading dishes. Placing the dishwasher on both the left or proper facet of the sink relies upon on your kitchen layout and whether or not you are left- or right-passed. Think approximately cabinet get right of entry to, foot traffic, and the way the door will open—those realistic concerns will ensure that your new appliance complements your kitchen’s usability, not avoid it.
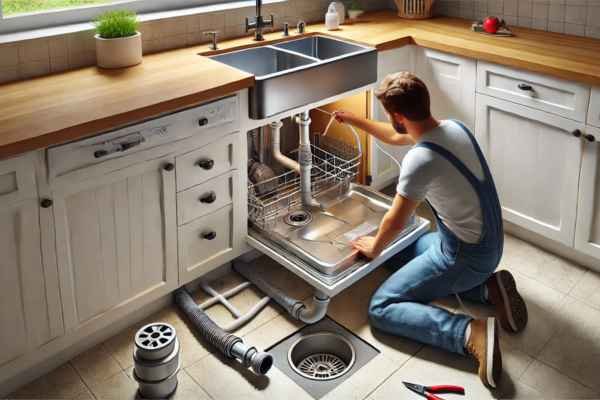
Plumbing and Electrical Considerations Before You Begin
A dishwasher requires a hot water deliver, a drainage outlet, and a energy connection. If your kitchen is not already prepared with these necessities, set up might also require expert assist. The electric circuit should be on a GFCI outlet with enough amperage, usually 15 or 20 amps, and also you’ll want a shutoff valve on the water supply line. Drainage can be routed thru the rubbish disposal or without delay to the sink’s drainpipe. Proper planning guarantees protection and compliance with building codes, particularly in case you’re doing a retrofit in an older kitchen.
Built-In vs. Portable vs. Drawer Dishwashers
Choosing the proper kind of dishwasher is vital, in particular whilst considering area, price range, and set up obstacles. Built-in dishwashers are the maximum commonplace and are seamlessly included into the cabinetry. Portable models offer flexibility and are ideal for renters or houses with out dedicated plumbing. Drawer dishwashers, although much less commonplace, are perfect for small loads and modern-day aesthetics. Each type comes with its own advantages, so selecting the one that suits your lifestyle and kitchen format is prime.
Built-In Dishwashers
Built-in dishwashers are designed to slide right into a fashionable 24-inch-extensive beneath-counter space and join at once to your own home’s plumbing and electric systems. They provide a easy, incorporated appearance and can regularly hold large loads. These are the quality option for owners undergoing a preservation or with an present cupboard beginning. They also are the quietest and maximum effective, presenting a wide range of cycles and customisation alternatives. However, installation may be complicated and may require expert aid.
Portable Dishwashers
Portable dishwashers are freestanding devices on wheels that hook up with the sink via a transient hose gadget. They are a high-quality answer for those dwelling in residences or homes with out a devoted dishwasher hookup. When now not in use, they may be rolled into a corner or used as additional countertop area. While they’ll now not have the ability or quiet operation of integrated fashions, they may be efficient, inexpensive, and easy to put in—no plumber required.
Drawer Dishwashers
Drawer dishwashers are a more recent, greater elegant choice that fits into a drawer-like compartment in your cabinetry. Available in unmarried or double-drawer configurations, those are ideal for smaller households or minimalist kitchens. Each drawer operates independently, making an allowance for smaller, power-saving cycles. They’re also ergonomically pleasant, decreasing the want to bend down. Drawer dishwashers tend to be extra luxurious and might have restricted capability as compared to traditional fashions, but their sleek design and performance lead them to a famous preference in excessive-quit kitchens.
Measuring for Fit: Getting the Right Dimensions
Proper measurement is the foundation of a successful dishwasher installation. Most standard built-in dishwashers are approximately 24 inches wide, 24 inches deep, and 35 inches high. However, not all kitchens are designed equally, and measurements can vary due to custom cabinetry or flooring differences. Begin by measuring the width, depth, and height of the space where you plan to install the unit. Remember to allow at least half an inch of clearance on each side for easy fitting and airflow. Also, account for the space needed behind the unit for hose and wire connections. Accurate dimensions prevent awkward gaps, tight squeezes, or costly returns.
Prepping Your Kitchen for the Installation
Once you’ve confirmed the measurements and purchased the right model, it’s time to prepare the installation area. Clear out the base cabinet or remove the old dishwasher if you’re replacing one. Clean the space thoroughly to remove any debris, old insulation, or dust that could obstruct the new appliance. If there’s no existing hookup, create accessible pathways for electrical wiring and water supply lines. Double-check that your floor is level using a spirit level—uneven surfaces can affect how the dishwasher functions and drains. Make sure nearby outlets and shutoff valves are in good working condition. This preparation ensures a smooth and efficient installation process.
Step-by-Step Guide to Installing a Dishwasher
Installing a dishwasher may seem intimidating, but with a step-by-step approach, Even a beginner can take it on confidently. Whether you’re replacing an old unit or installing one from scratch, These steps will guide you through the process safely and effectively.
Step 1: Turn Off Water and Power
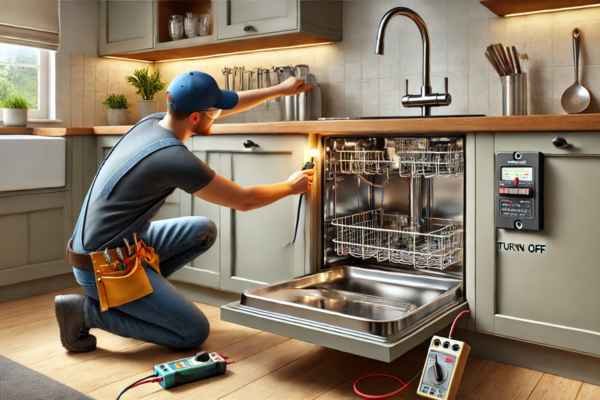
Safety first. Locate the circuit breaker for your kitchen and switch off the power. Then, turn off the hot water supply valve—typically found under the sink. Use a voltage tester to confirm there’s no electrical current in the wires you’ll be working with. For plumbing, open the tap to release residual pressure before disconnecting anything.
Step 2: Remove the Cabinet or Old Unit
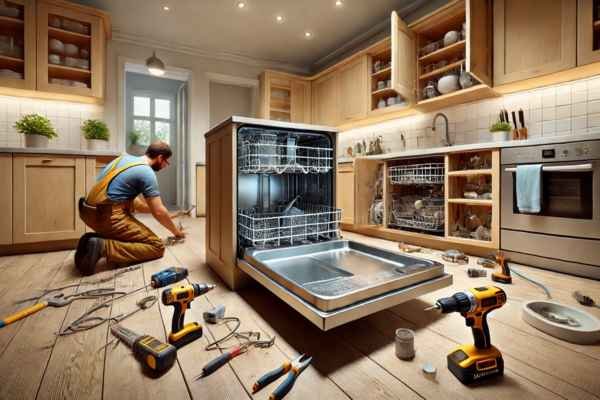
If you’re replacing an existing unit, disconnect the power, water, and drain lines before sliding the old dishwasher out. For new installations, remove the cabinet panel or section where the unit will go. Carefully cut through caulk or mounting screws with the right tools, making sure not to damage adjacent cabinetry.
Step 3: Set Up the Electrical Connection
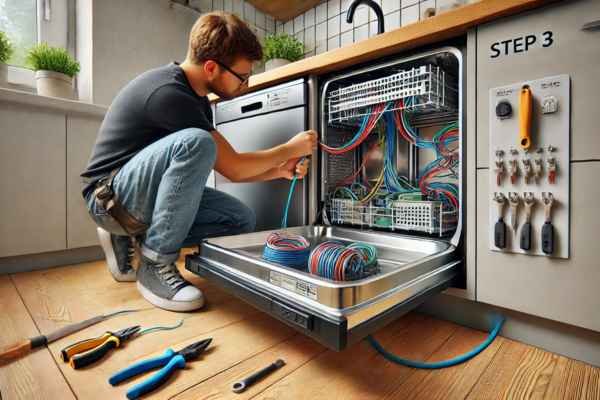
Thread the electrical wire through the back of the unit to the junction box (usually found at the bottom front). Most dishwashers will have color-coded wires—black (hot), white (neutral), and green or bare (ground). Connect each wire using twist-on wire connectors (wire nuts) and secure the junction box cover once complete. Ensure the wire isn’t pinched or stressed.
Step 4: Connect the Water Supply Line
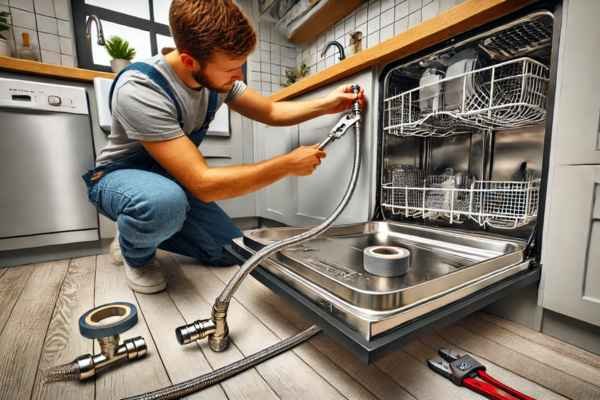
Use a stainless-steel braided hose to connect the dishwasher to the hot water supply under the sink. Attach the hose to the dishwasher’s water inlet using a 90-degree elbow fitting and plumber’s tape to prevent leaks. Tighten the connections with an adjustable wrench, but don’t overtighten—this can crack fittings and cause leaks later.
Step 5: Install the Drain Hose
Connect the dishwasher’s drain hose to the sink’s drainpipe or garbage disposal. Ensure the hose has a “high loop” or install an air gap device—this prevents wastewater from flowing back into the dishwasher. Secure the hose with a clamp and test the connection by running water through the sink.
Step 6: Slide in and Secure the Dishwasher
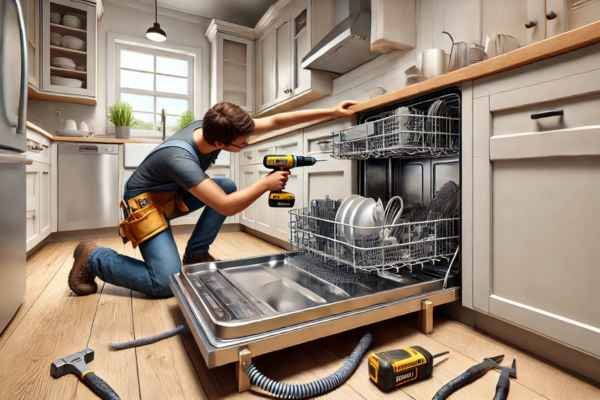
Carefully slide the dishwasher into place, ensuring the hoses and wires are not kinked or caught underneath. Use the leveling legs to align the unit evenly with the countertop. Once it’s perfectly positioned, fasten the top or side brackets to the cabinet for stability. A wobbly dishwasher can rattle, leak, or vibrate during operation.
Step 7: Test for Leaks and Power
Turn the water supply and power back on. Start a rinse cycle to check for any leaks at the water line, drain hose, or junction box. Monitor underneath the unit for at least a few minutes during the first cycle. If everything is dry and running smoothly, replace the toe-kick panel at the bottom, and you’re done!
Tools and Materials You’ll Need to Add a Dishwasher to a Kitchen
To ensure a smooth installation, it’s essential to gather all necessary tools and materials before starting. Basic hand tools such as a screwdriver (both flathead and Phillips), an adjustable wrench, and a pair of pliers are crucial. A power drill may be needed if you’re drilling new holes or mounting brackets. You’ll also need Teflon plumber’s tape to seal water line connections and avoid leaks. Other items include a voltage tester (for safety), wire nuts, a level to ensure proper alignment, and a bucket and towels to catch any water spills. As for materials, a dishwasher installation kit typically includes a 90-degree elbow fitting, water supply line (preferably braided stainless steel), and a drain hose with clamps. Having everything ready at your fingertips prevents unnecessary delays and reduces installation errors.
How to Add a Dishwasher Without an Existing Hookup
If your kitchen has never housed a dishwasher, adding one becomes a more involved task. You’ll need to create a new water supply line, drainage connection, and power source. For water, a T-fitting can be installed on the hot water pipe under your sink, allowing a separate line to the dishwasher. Drainage can be set up by adding a branch to your sink’s drainpipe or garbage disposal. Electrical hookup may require extending a dedicated circuit from your breaker panel, as most dishwashers draw significant power. It’s important to follow local codes—some jurisdictions require permits for new plumbing or wiring. For those without the tools or expertise, hiring a professional plumber and electrician ensures the job is safe, compliant, and done right the first time.
Dealing with Limited Space: Compact Solutions and Workarounds
Small kitchens shouldn’t be a barrier to owning a dishwasher. Today’s market offers several compact options that cater to space limitations. Slimline dishwashers, typically 18 inches wide, can fit into narrow cabinet slots while still handling a decent load. Countertop models, which connect temporarily to the kitchen faucet, are ideal for apartments or temporary setups. Drawer dishwashers are another sleek option that fits into tight spots and lets you run smaller loads efficiently. In some cases, sacrificing a lower cabinet or relocating seldom-used items to another storage area can create enough room. With a bit of creativity and planning, even the most cramped kitchens can accommodate a dishwasher.
Ventilation and Drainage Tips for Smooth Operation
Good drainage and ventilation are key to the long-term performance of your dishwasher. Always include a high loop in the drain hose or install an air gap to prevent dirty water from siphoning back into the appliance. Ensure the drain hose is properly secured and free from kinks or obstructions. As for ventilation, never block the space around the dishwasher’s motor and exhaust vents—these components need airflow to prevent overheating. Some units also release steam during the drying cycle, so ensure your countertop and surrounding cabinetry are water-resistant or properly sealed. Keeping these elements in check ensures efficient operation and prevents future damage or foul odours.
How to Maintain Your Dishwasher After Installation
Ongoing maintenance keeps your dishwasher running like new and extends its lifespan. Begin by cleaning the filter monthly to prevent clogs and ensure proper drainage. Run a cleaning cycle with white vinegar or a commercial dishwasher cleaner every few weeks to eliminate mineral buildup and bacteria. Inspect the spray arms to ensure they’re spinning freely and not blocked by debris. Also, wipe down the door seals with a damp cloth to prevent mould and mildew. Avoid overloading the machine and scrape off large food particles before loading dishes. Regular upkeep not only improves cleaning performance but also reduces the risk of costly repairs down the line.
Budget Breakdown: How Much Does It Cost to Add a Dishwasher?
The cost of adding a dishwasher can vary greatly depending on the type of unit, your kitchen’s current setup, and whether you choose to hire professionals. A standard built-in dishwasher typically ranges from 0 to ,200, with high-end models reaching beyond ,000. Installation materials—such as hoses, fittings, and wiring—may add another to 0. If your kitchen already has existing hookups, professional installation usually costs between 0 and 0. However, if your kitchen lacks plumbing or electrical connections, additional work from a plumber or electrician can raise your total by 0 to ,000. Altogether, a full installation may cost anywhere from 0 to ,500. Planning your budget in advance helps You avoid unexpected expenses and ensures A smoother process from start to finish.
Common Mistakes to Avoid When Adding a Dishwasher to a Kitchen
Many first-time installers make avoidable errors that can lead to frustrating setbacks or even appliance damage. One of the most common mistakes is failing to measure the space properly—leading to units that don’t fit, doors that won’t open fully, or hoses that kink. Another frequent error is skipping the high loop or air gap in the drain hose, which can allow dirty water to backflow into the dishwasher. Some people overlook the importance of leveling the unit, resulting in poor drainage or vibration. Using incompatible fittings or not sealing connections with plumber’s tape can also cause leaks. Rushing the electrical hookup without checking the circuit capacity may result in tripped breakers or fire hazards. Patience, precision, and preparation can help you steer clear of these pitfalls.
Eco-Friendly Tips When Installing and Using Your Dishwasher
A dishwasher can actually be more eco-friendly than hand washing—if used correctly. Begin by choosing an Energy Star-certified model, which uses less water and energy per cycle. Install it near your water heater to reduce the energy lost through long hot water lines. When running loads, always wait until the dishwasher is full, and select eco or light wash cycles when dishes aren’t heavily soiled. Skip the heated drying feature and let dishes air-dry instead. Use biodegradable or phosphate-free detergents to reduce environmental impact. Periodically clean the filter and spray arms to maintain peak efficiency. Small adjustments like these reduce waste and operating costs while promoting a greener kitchen routine.
When to Call a Professional (And When You Can DIY)
Adding a dishwasher is often manageable for experienced DIYers, especially if you’re replacing an old unit using existing hookups. However, when electrical wiring or new plumbing lines are involved, it’s usually safer—and legally required in some regions—to hire licensed professionals. If you encounter obstacles like outdated wiring, no dedicated power outlet, or complicated cabinetry, a professional can ensure everything meets code and functions safely. Likewise, if your floor is uneven or there’s visible water damage under your cabinets, it’s best to consult a specialist. On the other hand, if you’re simply swapping an old dishwasher for a new one of the same size and specs, and you’re comfortable using basic tools, the task can be completed confidently on your own.
Final Thoughts
Learning how to add A dishwasher to a kitchen is A rewarding project that adds both convenience And value to your home. With thoughtful planning, careful execution, and a bit of elbow grease, you can enjoy the benefits of sparkling clean dishes without the daily scrubbing. Whether you’re upgrading your current setup or installing one for the first time, understanding the ins and outs—from measuring space to eco-friendly usage—makes the entire process smoother. When in doubt, don’t hesitate to seek professional help, and always prioritise safety. Once your new appliance is up and running, you’ll wonder how you ever lived without it.