Adding a dishwasher to a small kitchen might seem like an impossible puzzle—but with the right planning, it’s absolutely doable. Whether you’re tired of handwashing dishes or looking to modernise your space, integrating a dishwasher can significantly improve convenience and cleanliness without sacrificing precious room. Thanks to compact models and clever design tricks, even the tiniest kitchens can accommodate this game-changing appliance. In this guide, you’ll discover practical solutions, space-saving ideas, and step-by-step instructions to help you install a dishwasher in your small kitchen—no renovation required. Let’s turn that tight space into a fully functional, efficient hub you’ll love working in.
Why a Dishwasher Is a Game-Changer for Small Kitchens
In a compact kitchen, space is precious—and so is time. A dishwasher may seem like a luxury, but in small kitchens, it can be a major game-changer. It not only eliminates the daily chore of handwashing dishes but also helps reduce countertop clutter and improves kitchen hygiene. Instead of stacking dishes in the sink or on drying racks, a dishwasher keeps them hidden and clean. Plus, many modern dishwashers are energy-efficient, using less water than traditional handwashing. In short, adding a dishwasher in kitchen isn’t just convenient—it’s smart.
Understanding Your Kitchen’s Limitations and Opportunities
Before installing a dishwasher, it’s essential to assess your kitchen’s layout and limitations. Look for underutilized spaces, such as an unused cabinet or corner, where the unit might fit. Consider the proximity to your sink and plumbing lines, as this will affect installation ease. If your kitchen lacks dedicated dishwasher hookups, don’t worry—solutions like portable or countertop models can bypass this hurdle. Think of your kitchen’s quirks as creative challenges rather than roadblocks.
Choosing the Best Type of Dishwasher for Small Spaces
Finding the right type of dishwasher is crucial when working with limited square footage. Fortunately, several compact and space-saving models are designed for small kitchens.
Built-in Dishwashers
These are installed beneath the countertop and typically require cabinet space. They offer a seamless look but need both plumbing and electrical connections. For small kitchens, slimline models (18-inch wide) are a great alternative to standard 24-inch versions.
Portable Dishwashers
If permanent installation isn’t an option, a portable dishwasher is ideal. These units are on wheels and can be rolled to the sink when needed, then stored away. They hook up easily to a faucet and don’t take up permanent space.
Countertop Dishwashers
These sit on your counter and connect to the sink. They’re perfect for renters or those with very limited space. Though smaller in capacity, they handle daily dishes efficiently and are often plug-and-play.
Single Drawer Models
These dishwashers are sleek and compact, offering just enough room for one day’s worth of dishes. They can be installed in drawers or even under the sink, providing flexibility and saving space without compromising function.
Planning Ahead: Measuring and Mapping Your Available Space
Precision is key when planning for a dishwasher in a small kitchen. Start by measuring the potential installation space—height, width, and depth. Account for door clearance and space needed for hoses and ventilation. Sketch a simple floor plan to visualize how the dishwasher will fit in. Don’t forget to include surrounding elements like cabinets, drawers, and appliances. You want to ensure the new unit won’t block any essential functions or create a cramped environment.
Maximising Every Inch: Clever Layout Ideas That Make Room
In small kitchens, creativity wins. Consider removing a rarely used cabinet to make way for a dishwasher. You might also reconfigure your lower cabinetry to combine drawers or shelves. Another idea is to use corner spaces or under-sink areas for installation. Open shelving can replace traditional upper cabinets to free up room visually, making the space feel more open even with a new appliance. When in doubt, vertical storage and wall-mounted racks can help balance out the loss of base cabinet space.
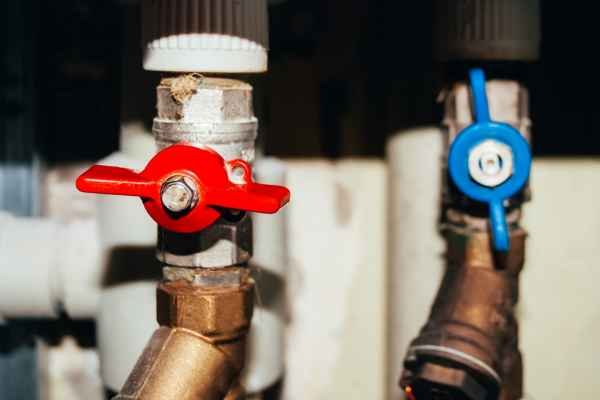
Plumbing and Electrical Requirements to Know Before You Start
Proper plumbing and electrical setup is essential for dishwasher functionality. Most built-in models require a hot water line, a drain line, and a dedicated 120-volt electrical outlet. You may need to install a water shutoff valve and ensure the drain hose has a “high loop” or air gap to prevent backflow. If your kitchen doesn’t have these connections, consult a plumber or electrician to install them safely. For portable and countertop models, plumbing demands are minimal—they typically connect to the faucet and require just a grounded outlet.
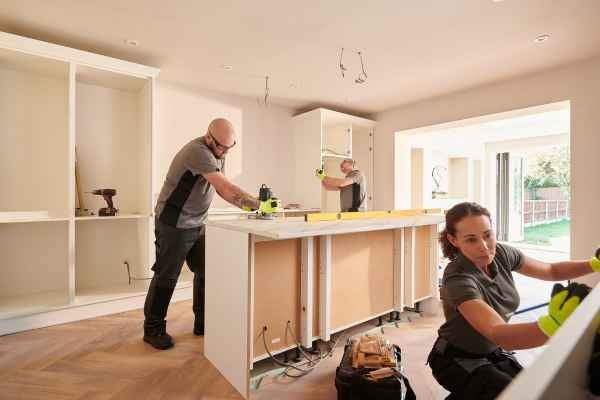
Step-by-Step Guide: How to Add a Dishwasher to a Small Kitchen
Installing a dishwasher in a tight space might seem overwhelming, but with the right plan, it’s completely manageable. Follow these step-by-step instructions to get your new appliance up and running, even in a small kitchen.
Step 1: Turn Off Power and Water Supply
Safety first. Before any work begins, switch off the circuit breaker connected to your kitchen and shut off the water supply to prevent leaks or shocks. This step protects both you and your existing plumbing or electrical systems during the installation process.
Step 2: Remove or Modify Cabinet Space
To make room for your dishwasher, remove a lower cabinet or modify existing cabinetry. This may involve cutting away shelving or adjusting framing. Be sure to measure your dishwasher and mark clear dimensions to avoid any fitting issues. You may also need to create ventilation holes or cut-outs for water lines and cords.
Step 3: Prepare the Plumbing Hookup
Dishwashers need access to both water supply and drainage. Connect a hot water line—usually a T-connection from the sink’s supply—and ensure a drain line runs to the garbage disposal or sink drain. Don’t forget to include a high loop or air gap to prevent dirty water from backing up into the dishwasher.
Step 4: Set Up the Electrical Connection
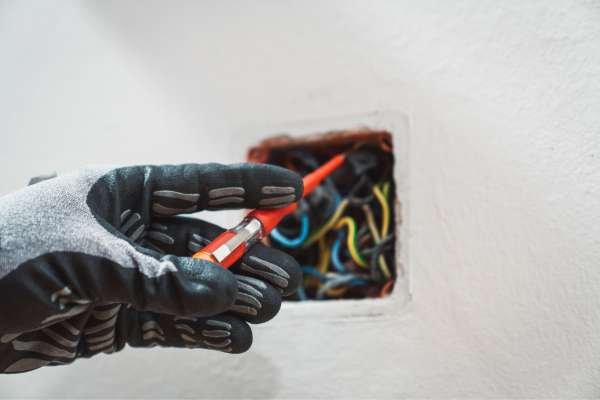
Most built-in dishwashers require a dedicated 120V outlet. You can either hardwire the unit or install a nearby outlet if none exists. If you’re unfamiliar with electrical work, this is one of the steps where hiring a licensed electrician is strongly recommended for safety.
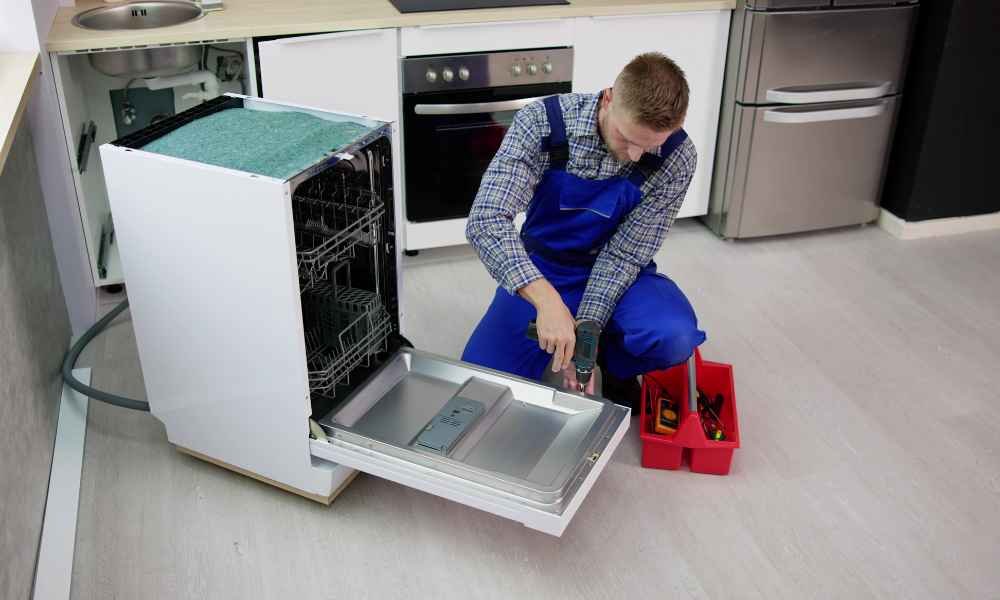
Step 5: Install the Dishwasher Unit

Now slide the dishwasher into place. Make sure hoses and wires aren’t pinched or crimped. Align the unit so it sits flush with your cabinetry and use adjustable feet to level it. A level dishwasher performs better and prevents internal drainage problems.
Step 6: Seal, Secure, and Test the Unit
Once in position, use the included mounting brackets to secure the unit to the countertop or cabinet sides. Check all connections—water, drain, and electrical. Then turn the water and power back on and run a test cycle to spot any leaks or issues. If everything works smoothly, reattach any trim or cover panels and enjoy your new setup.
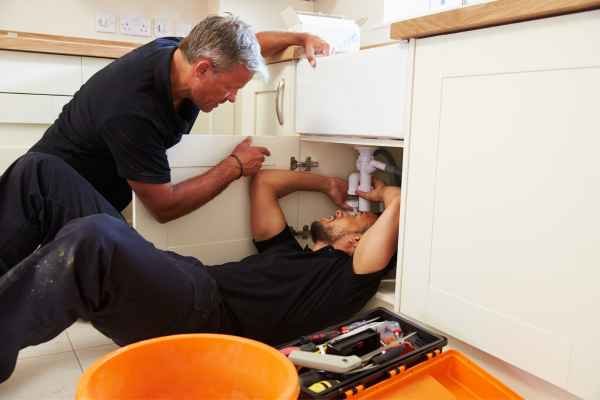
DIY vs. Hiring a Professional: What’s Best for Your Situation?
Whether you take the DIY route or hire help depends on your comfort level with plumbing and electrical work. If your kitchen already has hookups and you’re handy with tools, installing a dishwasher can be a fulfilling project. However, if you’re unfamiliar with modifying cabinetry or handling water and power connections, hiring a professional can save time, prevent damage, and ensure the job is up to code. Consider the complexity of your kitchen layout and the type of dishwasher you choose before deciding.
Creative Storage Hacks to Compensate for Lost Cabinet Space
Worried about losing storage when making room for a dishwasher? Don’t be. Small kitchens can benefit from vertical storage—install floating shelves above countertops or add a pegboard for hanging utensils and pans. Consider stackable drawer organizers or rolling carts that tuck into unused corners. A magnetic knife strip or under-cabinet hooks can also declutter drawers. With a little creativity, you can reclaim even more space than you lose, all while enjoying the convenience of a dishwasher.
How to Work Around a Lack of Existing Dishwasher Hookups
Not every small kitchen comes prepped with dishwasher hookups—but that doesn’t mean you’re out of luck. One solution is to choose a portable or countertop model that doesn’t require permanent plumbing. These dishwashers attach directly to your kitchen faucet and drain into the sink, making them ideal for renters or older homes. If you prefer a built-in unit, you may need to add a water supply line, a drain, and an electrical connection. This can be done with the help of a plumber and electrician, and though it may add to the upfront cost, it creates a long-term solution that boosts your kitchen’s functionality.
Small Kitchen Design Tips to Make the Dishwasher Blend Seamlessly
In small spaces, aesthetics matter just as much as function. A dishwasher can either feel like an eyesore or blend beautifully—depending on your design choices. For a seamless look, consider a panel-ready dishwasher that matches your cabinetry. If that’s not in your budget, choose a model in a neutral colour like white, black, or stainless steel to complement existing appliances. Also, position the dishwasher near the sink for efficient workflow and to reduce clutter. Even small details like matching handles or maintaining a uniform cabinet line can make a huge visual difference.
Cost Breakdown: What You Can Expect to Spend
The total cost of adding a dishwasher to a small kitchen varies depending on the type of unit and installation requirements. A basic countertop model might cost as little as $250, while a high-end built-in unit can go beyond $1,000. Installation services can range from $150 to $500, especially if new plumbing or electrical work is required. Don’t forget to factor in additional items like hoses, fittings, and potentially cabinet modifications. Overall, a well-planned installation—including appliance and labor—can cost between $500 and $1,500 for most households.
Common Mistakes to Avoid When Installing a Dishwasher in a Small Kitchen
Small kitchens demand precision, so avoiding common errors is essential. One mistake is underestimating the space required—both for the appliance and door clearance. Another is improper leveling, which can lead to drainage issues. Overlooking plumbing requirements or skipping the high loop/air gap can also cause backflow problems. Electrically, not using a dedicated circuit may overload your system. Lastly, ignoring manufacturer installation instructions or rushing through the process can lead to leaks, poor performance, or voided warranties. Take your time, and when in doubt, consult a professional.
Space-Saving Tips: Using Multi-Functional Appliances and Furniture
When square footage is tight, every item should serve multiple purposes. Consider installing a dishwasher with a small top rack that doubles as a drying tray or one that offers storage when not in use. Use fold-down tables or wall-mounted shelves to reclaim workspace. An island on wheels can serve as a prep area, storage unit, and movable surface to cover the dishwasher when not in use. Think vertically, too—add ceiling-height shelving or hooks to keep counters clear. The key is to integrate your dishwasher without sacrificing function elsewhere.
Eco-Friendly Installation and Water-Saving Features to Look For
Modern dishwashers are far more efficient than older models—and even more eco-friendly than handwashing. Look for Energy Star-rated units that use less water and electricity. Some models have half-load or quick-wash settings that reduce consumption when you don’t have a full load. During installation, use high-efficiency hoses and ensure proper insulation around water lines to avoid energy loss. Avoid pre-rinsing dishes, which wastes water unnecessarily. By choosing a sustainable setup, you not only save resources but also lower your utility bills.
Final Checks
Once your dishwasher is installed, it’s time to do a final walk-through. Make sure the appliance is level, firmly secured, and that there are no visible leaks from the water or drain lines. Run a short cycle to test performance—check for unusual noises, vibration, or pooling water. Review the manual to confirm you’ve used the correct settings and maintenance guidelines. Lastly, reinstall any cabinetry trim or finishing pieces to tidy up the look. With everything in place and functioning properly, your small kitchen is now smarter, more efficient, and easier to manage.