Your KitchenAid dishwasher isn’t appearing adore it used to, or in case you’ve observed ugly smells or leftover meals particles after a wash cycle, it is probably time for a radical cleansing. This manual will walk you through the whole lot you need to understand about the way to smooth your KitchenAid dishwasher—from basic maintenance to deep cleansing techniques. Whether you are new to dishwashers or simply want to maintain yours strolling smoothly, these simple steps will assist restore its overall performance and prolong its existence. With only some gear and family items, you may be able to smooth your dishwasher like a seasoned, even supposing it’s your first time doing it.
Why Cleaning Your KitchenAid Dishwasher Matters for Performance and Longevity
Cleaning your KitchenAid dishwasher isn’t pretty much appearance—it’s essential for performance and sturdiness. Over time, meals debris, grease, detergent residue, and hard water minerals can increase inside the spray fingers, filters, and drain. This buildup can reason unpleasant odors, blockages, and even mechanical problems that have an effect on how properly your dishwasher cleans. Regular cleansing prevents these issues, making sure your equipment runs efficiently, uses less strength, and lasts longer. A clean dishwasher additionally enables preserve your dishes honestly easy and cleand, making your efforts inside the kitchen extra rewarding.
How Often Should You Clean Your KitchenAid Dishwasher?
The frequency of cleaning your KitchenAid dishwasher depends on how often you use it. As a general rule, you should do a light clean every week and a more thorough deep clean every month. The filter should be cleaned at least once a month, especially if you use the dishwasher daily or don’t pre-rinse your dishes. If you notice cloudy glassware, food bits left behind, or a musty smell, it’s likely time for a full cleaning session. Staying on top of a simple cleaning schedule can save you from costly repairs and frustrating dishwashing results down the line.
Signs Your KitchenAid Dishwasher Needs a Deep Clean
Several warning signs indicate your KitchenAid dishwasher could benefit from a deep clean. One of the most common is a persistent bad odor that doesn’t go away even after running a wash cycle. You might also see visible residue or grime inside the tub, or notice water pooling at the bottom after a cycle ends. If dishes are coming out dirty, streaky, or still wet, this could signal clogged spray arms or a dirty filter. Strange noises during the wash cycle or unusually long cycle times are other clues that your machine needs attention. Don’t ignore these signs—they often point to buildup that can easily be removed with proper cleaning.
Pre-Cleaning Checklist: What You’ll Need Before You Start
Before diving into cleansing your KitchenAid dishwasher, it’s beneficial to accumulate all of the vital materials. You’ll want a smooth cloth or sponge, a toothbrush or small scrub brush, dish soap, white vinegar, and baking soda. For greater cussed buildup, recollect using a toothpick or a pin to easy out spray arm holes. A screwdriver might be wished if your version requires equipment to get right of entry to the filter out or spray palms. Rubber gloves are also a good concept to defend your arms from filth or warm water. Having everything geared up beforehand makes the cleaning process smoother and extra green, particularly for novices.
Step-by way of-Step Guide to Cleaning a KitchenAid Dishwasher
Cleaning your KitchenAid dishwasher doesn’t should be overwhelming. By following a simple step-via-step procedure, even beginners can repair their appliance to highest quality condition. This approach ensures that every a part of your dishwasher—from the filter to the spray fingers—is easy and running efficiently, supporting prevent odors, stains, and negative overall performance. Let’s destroy down every challenge so you can hopefully easy your dishwasher from top to bottom.
Turn Off and Unplug the Appliance
Safety first—earlier than you start, ensure the dishwasher is completely became off. If viable, unplug it or switch off the circuit breaker that powers it. This precaution ensures you received’t by accident begin the appliance or stumble upon electrical risks while cleansing internal additives.
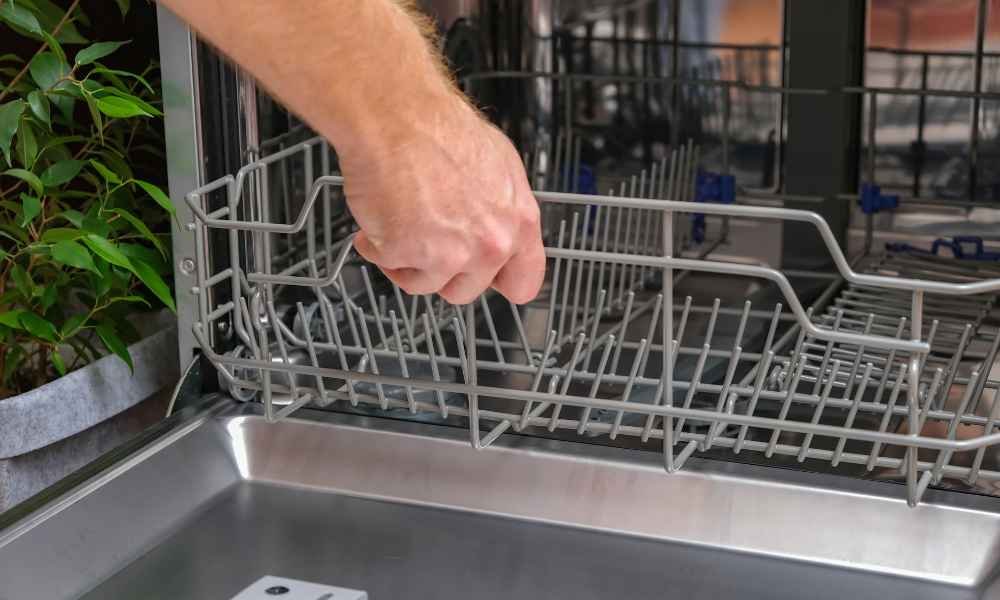
Remove and Rinse the Bottom Rack
Pull out the bottom rack of your dishwasher to create easy access to the inner components. Give it a rinse under warm water in the sink to remove any stuck-on food or debris. If it’s particularly dirty, you can use a sponge and mild dish soap to scrub it clean before setting it aside to dry.
Take Out the Spray Arms and Clean Thoroughly
Spray arms are crucial for circulating water during the wash cycle, so keeping them free from clogs is essential. Remove the spray arms according to your model’s instructions—usually, a gentle twist will do. Rinse them under running water and use a toothpick or a small brush to clean out the tiny holes where water sprays out. This helps maintain strong water pressure and consistent cleaning.
Access and Clear Out the Drain Area
Next, check the drain area at the bottom of the dishwasher for food particles, glass shards, or grease buildup. Carefully remove any debris you find by hand or with a paper towel. A clogged drain can prevent proper water flow and lead to foul odors or standing water, so don’t skip this step.
Remove and Wash the Filter
Your KitchenAid dishwasher’s filter traps food particles during the wash cycle. Over time, it can become clogged and reduce the appliance’s efficiency. Twist and lift the filter out from the bottom of the unit. Rinse it under warm water and scrub gently with a soft brush to remove residue. If the filter is heavily soiled, soak it in a mixture of warm water and dish soap for 10–15 minutes before rinsing again.
Wipe Down the Door Seals and Interior Walls
The rubber seals around the door can collect grime and mold, especially in humid environments. Use a damp cloth with a little dish soap or vinegar to wipe them clean. Then, clean the interior walls of the dishwasher tub, focusing on the corners and edges where grease or food splashes may stick. This not only keeps the dishwasher hygienic but also prevents musty odors from developing.
Reassemble and Run a Cleaning Cycle
Once all parts are cleaned and dried, reassemble everything in reverse order—install the filter, replace the spray arms, and slide the bottom rack back into place. Finally, run a cleaning cycle using hot water and no dishes inside. For extra freshness, place a cup of white vinegar on the top rack or use a commercial dishwasher cleaner during this cycle. This rinse will flush out loosened debris and give your dishwasher a final polish.
Different Methods to Clean a KitchenAid Dishwasher
While the step-by-step method works well for monthly deep cleans, there are several alternative cleaning methods you can use depending on your needs, preferences, or what’s available in your home.
Manual Cleaning Using Basic Tools
Sometimes, a sponge, brush, and a bit of elbow grease are all you need. Manual cleaning involves scrubbing components like the filter, spray arms, and drain area using warm, soapy water. This is an effective option if you prefer to avoid chemical cleaners and want a hands-on approach.
Natural Cleaning With Vinegar and Baking Soda
This eco-friendly method is great for eliminating odors and mild buildup. First, place a cup of white vinegar on the top rack and run a hot water cycle. Then, sprinkle baking soda across the bottom of the tub and run a short cycle. Vinegar acts as a degreaser and disinfectant, while baking soda freshens and deodorizes.
Using Store-Bought Dishwasher Cleaners
If you prefer a quicker, hands-off option, commercial dishwasher cleaners are highly effective. These are specially formulated to dissolve grease, remove mineral buildup, and eliminate odors. Simply follow the product instructions—most require placing the cleaner inside the empty dishwasher and running a hot cycle.
Flushing With Hot Water and Dish Soap
For light maintenance, pouring hot water mixed with a few drops of dish soap directly into the bottom of your empty dishwasher and running a rinse cycle can help loosen grime. This method works well between deep cleans to maintain a fresher-smelling, cleaner machine.
How to Clean the Dishwasher Filter and Why It’s Important
The clear out on your KitchenAid dishwasher plays a crucial role in catching meals debris and preventing them from recirculating all through the wash cycle. Over time, this clear out can end up clogged with particles, grease, and residue, main to foul odors, negative drainage, and unsanitary conditions. To clean the filter, first remove the bottom rack and locate the filter at the base of the dishwasher tub. Most KitchenAid models have a removable cylindrical filter that you can twist and lift out. Rinse it under warm water and gently scrub with a soft brush to dislodge trapped food particles. If it’s especially dirty, soak it in soapy water for 10–15 minutes before rinsing again. Cleaning the filter monthly not only ensures cleaner dishes but also protects the internal components of your dishwasher from potential damage.
Cleaning the Spray Arms to Improve Water Flow
The spray arms in your KitchenAid dishwasher are responsible for distributing water evenly across your dishes. When the tiny holes in these arms get clogged with food residue or mineral deposits, the water pressure weakens, leading to spotty or incomplete cleaning. To maintain optimal water flow, remove the spray arms by gently twisting them off or unscrewing, depending on your model. Rinse them thoroughly under running water and use a toothpick or small brush to clear out any debris blocking the spray holes. After cleaning, shake out any remaining water and reinstall the arms securely. Performing this task every couple of months keeps your dishwasher operating efficiently and ensures sparkling clean dishes.
How to Remove Grease and Soap Scum From the Interior
Grease and soap scum can gradually coat the interior of your dishwasher, especially along the walls, around the detergent dispenser, and in hard-to-reach corners. This buildup can dull the appearance of your dishwasher and contribute to lingering smells. To tackle it, wipe down all interior surfaces with a sponge or soft cloth soaked in a solution of warm water and dish soap. For stubborn spots, use a bit of white vinegar or baking soda as a gentle scrub. Pay extra attention to the edges of the door, the rubber gaskets, and the detergent compartment. Once clean, run a rinse cycle with the dishwasher empty to flush away loosened residue. Keeping the interior grease-free not only enhances cleanliness but also improves the dishwasher’s performance.
Dealing With Hard Water Stains and Mineral Buildup
If you live in an area with hard water, your KitchenAid dishwasher is likely to accumulate white spots and chalky residue from mineral buildup. These stains can affect both the appearance and function of your appliance, including clogging the spray arms and leaving cloudy dishes. To remove these deposits, run an empty cycle with a cup of white vinegar placed on the top rack. Vinegar breaks down calcium and lime scale without damaging internal parts. For extra effectiveness, sprinkle baking soda on the bottom of the tub and run a second short cycle. You can also invest in a dishwasher cleaner designed specifically for hard water. Regular treatment keeps mineral buildup under control and extends the life of your dishwasher.
Tips for Preventing Odors and Mold in Your KitchenAid Dishwasher
A musty or sour smell from your dishwasher is usually a sign of leftover food, moisture buildup, or mold. Preventing odors starts with routine maintenance and proper loading habits. Always scrape off large food scraps before loading dishes, and run the dishwasher regularly to avoid stagnant water. Leave the door slightly open after each cycle to let air circulate and dry out the interior. Clean the filter and drain area at least once a month to remove hidden gunk that can rot over time. Occasionally running a vinegar or baking soda cycle helps neutralize lingering smells naturally. If your dishwasher goes unused for a few days, place a small bowl of baking soda inside to absorb moisture and keep the air fresh. With these simple habits, you can keep your KitchenAid dishwasher smelling clean and running hygienically.
Troubleshooting: What to Do If Your Dishwasher Still Smells or Drains Poorly
Even after a thorough cleaning, your KitchenAid dishwasher may still emit unpleasant odors or struggle with drainage. If that’s the case, it’s time to dig a little deeper into troubleshooting. Start by double-checking that the filter is completely clean and properly reinstalled. Then, inspect the drain hose for blockages or kinks that might be preventing water from flowing out. Grease buildup can also accumulate in the hose and drain pump, requiring professional attention. If odors persist, clean the garbage disposal if your dishwasher is connected to it, as smells can transfer back through shared plumbing. Lastly, run a high-temperature cycle with dishwasher cleaner or white vinegar to target bacteria that may be lingering in hidden spots. Persistent issues may indicate worn-out parts or internal malfunctions, so don’t hesitate to consult a technician if basic fixes don’t solve the problem.
Quick Maintenance Routine to Keep Your Dishwasher Clean and Running Smoothly
Keeping your KitchenAid dishwasher in peak condition doesn’t require hours of work. A quick, consistent maintenance routine can go a long way in preventing future problems. Begin by wiping down the interior and door seals once a week using a damp cloth and mild cleaner. Make it a habit to remove and rinse the filter monthly to prevent clogging. Every few weeks, run a cleaning cycle with a cup of white vinegar or a commercial dishwasher cleaner to flush out grease and residue. Keep the spray arms clean by checking for blockages every couple of months. After each use, leave the door slightly ajar to allow moisture to escape and reduce the risk of mold or odors. These simple steps, performed regularly, will keep your dishwasher fresh, efficient, and ready for daily use.
How to Prevent Clogs in Your KitchenAid Dishwasher Drain
Drain clogs are one of the most common reasons dishwashers perform poorly. Fortunately, with a little preventative care, they’re also easy to avoid. Always scrape large food particles off your dishes before placing them in the dishwasher—this reduces the chance of debris building up in the filter or drain. Regularly clean the filter and inspect the drain area to catch blockages early. Avoid overloading the dishwasher, as cramped dishes can restrict water flow and trap food particles. If you live in an area with hard water, mineral deposits can also cause drainage issues, so running occasional cleaning cycles with vinegar can help. Lastly, check the drain hose for bends or clogs if you notice slow draining. With these preventive measures, you can reduce the risk of backups and keep your KitchenAid dishwasher draining efficiently.
When to Replace Parts Like Filters, Spray Arms, or Seals
While regular cleaning extends the life of your dishwasher, some parts naturally wear out over time and need replacement. If your filter has become damaged, warped, or is no longer catching debris properly even after cleaning, it’s time for a new one. Spray arms should be replaced if they become cracked or clogged beyond cleaning, as reduced water pressure affects cleaning quality. Door seals can wear out or crack, leading to leaks or reduced efficiency—if you notice water pooling outside the dishwasher or visible wear, replacement is likely needed. Replacing worn parts not only restores performance but also prevents more expensive repairs in the future. KitchenAid provides replacement parts compatible with your model, and many can be installed at home with basic tools and instructions.
Final Thoughts
Learning how to clean a KitchenAid dishwasher is a valuable skill that pays off in cleaner dishes, fewer repairs, and a longer-lasting appliance. With just a little regular care and occasional deep cleaning, you can keep your dishwasher performing like new for years to come. From scrubbing the filter to clearing the spray arms and preventing clogs, these small tasks can make a big difference. Whether you’re a beginner or just looking to maintain your investment, following this comprehensive guide will help you keep your KitchenAid dishwasher running smoothly, efficiently, and odor-free.