A dishwasher is a kitchen workhorse, tirelessly scrubbing and rinsing whilst we sit down back and relax. But like all hardworking equipment, it wishes regular care—especially the clear out. If you’ve noticed your KitchenAid dishwasher isn’t performing love it used to, the wrongdoer should very well be a grimy clear out. This manual will walk you thru exactly how to Clean Kitchen Aid Dishwasher Filter with no trouble, ensuring your dishes sparkle and your gadget runs easily.
Understanding the Role of the Dishwasher Filter in a KitchenAid Machine
The dishwasher filter out plays a critical in the back of-the-scenes function. During every wash cycle, it captures leftover food debris, bits of grease, and particles before they are able to recirculate via the water jets. Without this barrier, dirt might redeposit for your dishes or, worse, clog internal components. A clean Strainer guarantees efficient water flow, proper drainage, and a hygienic cleaning environment inner your KitchenAid dishwasher.
Why Cleaning Your KitchenAid Dishwasher Filter Is So Important
Over time, food residue accumulates and clogs the mesh of the Strainer out. When this takes place, your dishwasher can’t perform effectively. Dirty filters result in cloudy glassware, foul odors, longer cycle times, or even mechanical issues. Regular cleansing prevents these troubles, permitting your gadget to run smoothly at the same time as decreasing the hazard of high priced repairs. In short, it’s a easy step that yields big blessings for overall performance and hygiene.
How Often Should You Clean Your KitchenAid Dishwasher Filter?
The frequency of Strainer cleaning depends largely on how often you use your dishwasher and how dirty your dishes are when loaded. As a rule of thumb, for average household use, cleaning the Strainer once a month is recommended. If you run heavy loads daily or rarely pre-rinse dishes, you may need to clean it every two to three weeks. For light users, once every two to three months may be sufficient. Setting a recurring reminder can help build this into your regular cleaning routine.
Telltale Signs Your KitchenAid Dishwasher Filter Needs a Cleaning
It’s easy to miss the early warnings, but your dishwasher does drop hints. If your dishes come out with food specks, if there’s a strange or musty smell coming from inside, or if water is pooling at the bottom of the unit, it’s likely time to clean the filter. You may also hear unusual grinding noises as the machine struggles to work harder through clogged pathways. Don’t ignore these signs—they’re your dishwasher’s way of asking for help.
Where Is the Filter Located in a KitchenAid Dishwasher?
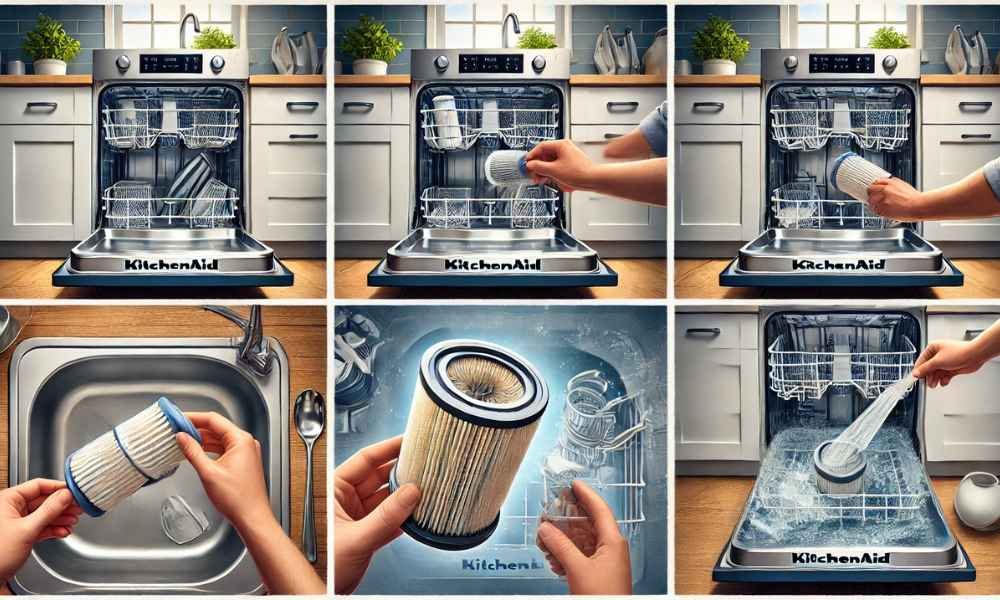
Finding the filter is straightforward. In most KitchenAid dishwashers, it’s located beneath the bottom rack, in the center or rear section of the tub. Typically, it consists of two parts: an upper cylindrical Strainer and a lower flat screen filter. Both parts twist and lift out easily by hand—no tools required. Once removed, they can be gently cleaned under running water and scrubbed with a soft brush to dislodge stuck-on grime.
Different Types of KitchenAid Dishwasher Filters
KitchenAid dishwashers generally come with one of two types of filters: manual-clean Strainer or self-cleaning filters. Knowing which type you have helps determine the right approach for cleaning.
Manual-Clean Filters
These filters are found in most newer KitchenAid models. They’re energy-efficient and quieter than older designs, but they require regular hand-cleaning. You can typically identify a manual-clean Strainer by its removable, cylindrical shape located under the bottom spray arm. These filters trap food particles during each wash and need to be rinsed and scrubbed about once a month to keep your dishwasher functioning properly.
Self-Cleaning Filters
Older or premium models might use self-Clean Kitchen Aid Dishwasher Filter, which come equipped with a built-in grinder that pulverizes food debris during the wash cycle. While they’re convenient and require less frequent manual maintenance, these filters are noisier and slightly less energy-efficient. However, even self-cleaning filters benefit from occasional inspections and a light rinse to ensure optimal performance.
Tools You’ll Need Before You Start Cleaning
Before diving into the cleaning process, it’s helpful to gather all the necessary tools. This not only saves time but Also Ensures A more thorough job. You’ll need:
- A soft-bristle brush or an old toothbrush
- Dish soap or a mild cleaning detergent
- White vinegar or baking soda for natural cleaning
- A microfiber cloth or soft sponge
- A bowl of warm water
- Rubber gloves (optional, for those with sensitive skin)
Having these tools on hand makes the job easier and more efficient, especially when dealing with tough grime or lingering odors.
Safety First: Pre-Cleaning Precautions You Should Take
Dishwasher maintenance might seem simple, but safety should always come first. Start by disconnecting the dishwasher from its power source. Either unplug the unit or switch off the circuit breaker to avoid any chance of electrical shock. Ensure the dishwasher is completely cool and empty before you begin. Remove the bottom rack to access the filter area easily. Place a towel or rag nearby in case water drips during the process. Taking these precautions ensures your cleaning session is safe, smooth, and effective.
Step-by-Step Guide to Clean Kitchen Aid Dishwasher Filter
Step 1: Turn Off and Unload Your Dishwasher

Always start by ensuring your safety. Turn off the dishwasher and unplug it from the power source, or flip the corresponding breaker. Make sure the interior is cool to the touch before proceeding. Remove all dishes and slide out the bottom rack to give yourself clear access to the filter at the bottom of the tub.
Step 2: Locate and Remove the Filter
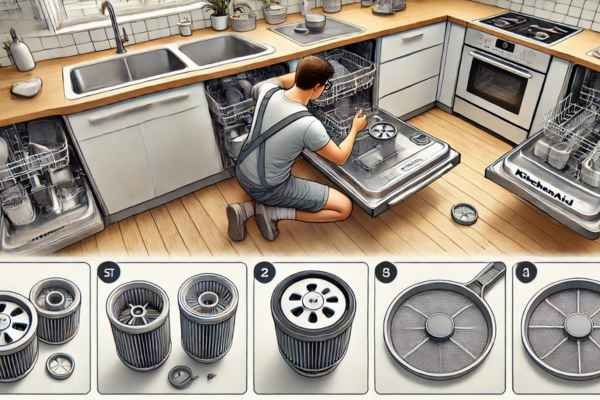
KitchenAid dishwashers typically have a two-part filter system, located under the lower spray arm. Twist the round Strainer cap counterclockwise and gently lift out the cylindrical upper filter. Beneath it, you’ll find a flat, mesh screen filter—lift this out carefully. Take note of how each part fits, so reinstallation is easy later on.
Step 3: Rinse and Scrub the Filter Gently
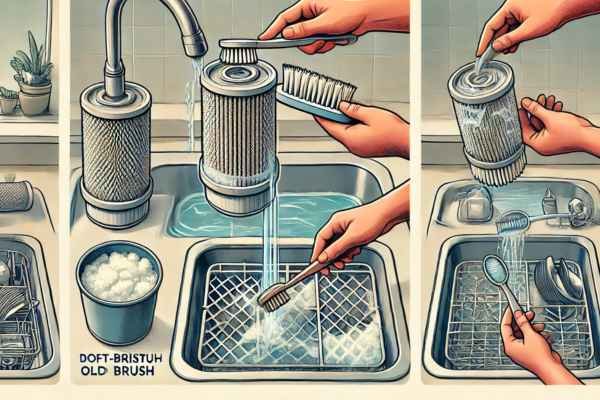
Using warm running water, rinse off loose debris from both filter parts. For stubborn bits of food or grease, use a soft-bristle brush or old toothbrush along with dish soap. Avoid using anything abrasive that could damage the mesh. For filters with strong buildup, soaking in warm soapy water for 10–15 minutes can help loosen grime.
Step 4: Clean the Filter Housing

Don’t stop with just the filters—the area they sit in needs attention too. Using a damp sponge or cloth dipped in dish soap and warm water, wipe the inside of the Strainer housing. Check for hidden food particles, greasy residue, or mold around the base and drain area. A clean housing helps ensure smooth drainage and odor control.
Step 5: Reinstall the Filter Properly
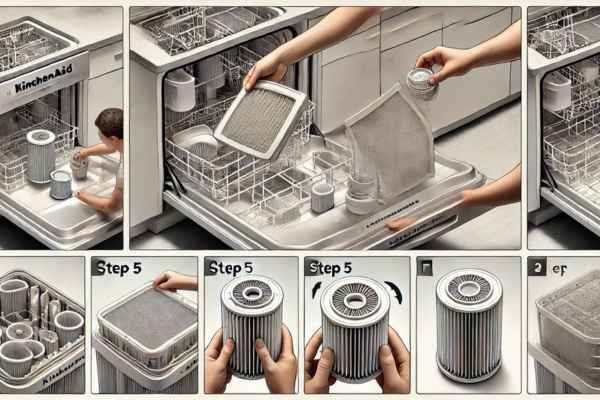
Once the filter components are dry and clean, slide the mesh filter back into its original position. Then place the cylindrical filter on top, aligning the arrows or notches (if present), and twist clockwise to lock it in. It should sit flush with the base and feel secure—if it wobbles, it’s not properly in place.
Step 6: Run a Test Cycle to Finish Up

After reassembling, run a short or rinse-only cycle without any dishes to clear out any loosened debris and confirm that the filter is securely installed. This final step ensures that everything works as it should and that no water backups or errors occur during the next full wash.
Best Cleaning Methods for Stubborn Grease and Grime
Sometimes, a simple rinse isn’t enough. For filters that are clogged with thick residue or grease, try one of these proven methods.
Vinegar Soak Method
Fill a bowl or bucket with equal parts warm water and white vinegar. Soak the Strainer for 15–20 minutes to break down mineral buildup and grease. After soaking, scrub gently with a soft brush, rinse thoroughly, and dry before reinstalling. Vinegar also helps neutralize odors naturally.
Baking Soda and Toothbrush Method
If you prefer a more abrasive—but still safe—approach, sprinkle baking soda directly onto the filter. Use a wet toothbrush to scrub the filter gently. Baking soda is effective at removing grease and neutralizing odor without damaging the filter’s surface. Rinse thoroughly with warm water.
Commercial Cleaner Option
For filters with stubborn, baked-on grime that household remedies can’t handle, consider a commercial dishwasher Strainer cleaner. Make sure it’s safe for plastic and mesh components, and always follow the product’s instructions. These cleaners are formulated to break down grease, mold, and limescale quickly and effectively.
Can You Put a KitchenAid Dishwasher Filter in the Dishwasher?
While it might seem convenient to let your dishwasher clean its own filter, this is a definite no-go. The high-pressure jets and heat used during a cycle can damage the mesh or warp the plastic components of the filter. Handwashing is always the safest and most effective method. Gently rinsing with warm water and scrubbing with a soft brush gives you full control over pressure and ensures delicate parts stay intact.
What to Avoid When Clean Kitchen Aid Dishwasher Filter
Clean Kitchen Aid Dishwasher Filter might sound straightforward, but a few common mistakes can do more harm than good. Avoid using harsh chemicals like bleach or ammonia, as they can degrade plastic and rubber components. Never use steel wool or abrasive scrub pads, which can tear the fine mesh of the filter. Also, don’t reinstall the Strainer while it’s still wet—this can lead to trapped moisture, mold growth, or improper fitting. Lastly, skipping the filter housing is a mistake; even a clean filter won’t work properly if it sits in a dirty compartment.
How to Maintain a Clean Filter for Longer Performance
Keeping your filter clean for longer starts with smart daily habits. Always scrape off large food particles before loading dishes—this reduces how much debris the filter has to trap. Once a month, run a hot cycle with a bowl of white vinegar on the top rack to flush out grease and mineral buildup. Every couple of weeks, inspect the Strainer for visible debris. These habits help your dishwasher work efficiently and reduce the need for deep cleaning.
Troubleshooting Common Issues After Cleaning the Filter
If your dishwasher still seems off after a thorough filter clean, a few other issues may be at play. Make sure the filter is reinstalled correctly—if it’s loose or misaligned, water may not drain properly. Check the spray arms for clogs, which can limit water distribution. You should also inspect the drain hose for kinks or blockages. In rare cases, a faulty pump or worn gasket could be the culprit. Keeping an eye on performance helps you identify these issues before they escalate into costly repairs.
When to Replace the Filter Instead of Cleaning It
Filters can last for several years with proper care, but they aren’t meant to last forever. If you notice the mesh is torn, the plastic is cracked, or grease has built up to the point it can’t be removed, it’s time for a replacement. A damaged Strainer can’t trap debris effectively and may allow food particles to circulate throughout the dishwasher. Always check your user manual or KitchenAid’s website to find the correct replacement part for your model.
Tips to Keep Your KitchenAid Dishwasher Running Like NewI
In addition to filter maintenance, a few proactive steps can help extend the lifespan of your KitchenAid dishwasher. Run hot water at the sink before starting the dishwasher to ensure the first fill is warm. Don’t overload the racks—this can block spray arms and reduce cleaning power. Use the right detergent in the correct amount, and regularly inspect the door seal to prevent leaks. Most importantly, make Strainer cleaning a regular part of your routine. With just a little effort, your dishwasher will continue delivering spotless results, cycle after cycle.