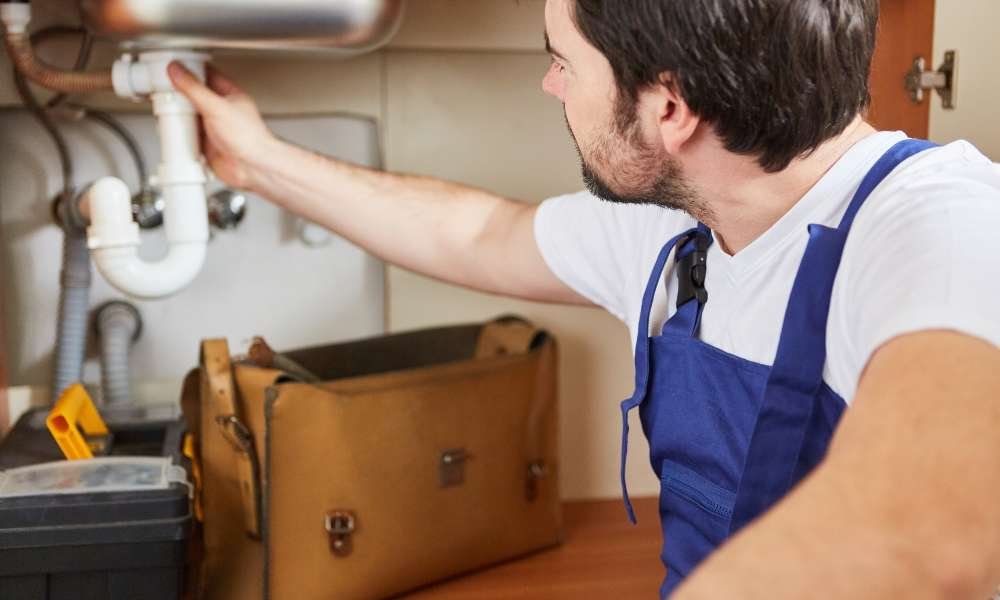
Installing a dishwasher can experience like a frightening venture—specially if it’s your first time—however the good information is that connecting it to a sink is less complicated than you may think. Whether you are running with a integrated model or a transportable unit, the procedure follows a truthful path once you apprehend how dishwashers and sinks work together. Most cutting-edge kitchens are designed with plumbing that allows a dishwasher to percentage the water deliver and drainage machine with the sink, making set up a great deal more convenient. In this manual, we’ll stroll you thru the entirety you want to recognize—from the equipment you’ll need and exceptional connection sorts, to step-by means of-step instructions and protection suggestions. By the cease, you’ll have a dishwasher that’s nicely established and ready to make your kitchen life easier.
Understanding How a Dishwasher and Sink Work Together
A dishwasher and a sink often percentage plumbing lines for your kitchen, especially whilst hooked up facet with the aid of facet. The dishwasher drains water thru a hose that typically connects to the sink’s drain or garbage disposal. It additionally receives water from the same deliver line that serves the sink faucet. Understanding this shared device is important due to the fact if something goes wrong—like a clog—it can effect both dishwashers and the sink. Knowing how those two structures have interaction facilitates make sure a smooth, leak-loose set up and efficient operation.
Why It’s Important to Connect Your Dishwasher Properly
Proper connection isn’t just about comfort—it’s about protection and long-time period performance. An incorrectly related dishwashers can cause serious issues like water leaks, backflow of dirty water, or even damage to your shelves or floors. It can also void your appliance’s warranty. Proper connections also ensure your dishwasher operates efficaciously, cleaning your dishes thoroughly without overworking the motor or flooding your kitchen.
What You’ll Need Before You Start: Tools and Materials Checklist
Before diving into the installation, gather the following essentials:
- Adjustable wrench
- Screwdriver
- Plumber’s tape
- Hose clamps
- Dishwasher installation kit (usually includes water inlet line, drain hose, and fittings)
- Power drill (if cabinet modification is required)
- Bucket and towel (to catch any residual water)
Having these tools on hand will save time and prevent interruptions during the setup process.
Types of Dishwasher Connections
When it comes to connecting your dishwashers to the sink, there are two primary methods, and the right one depends on your kitchen’s plumbing setup.
Direct Plumbing Hookup
This method involves connecting the dishwasher’s water supply line directly to the hot water supply under the sink. The drain hose then connects to the sink’s drain pipe or garbage disposal. It’s the most common setup and offers a more permanent solution. Be sure to create a “high loop” in the drain hose or install an air gap to prevent dirty water from flowing back into the dishwasher.
Faucet Adapter Method
Ideal for portable dishwashers, this method uses an adapter that connects to your kitchen faucet. When in use, the dishwasher draws water from the faucet and drains back into the sink. It’s a non-permanent option, perfect for renters or small kitchens. However, it’s less convenient for frequent use and limits access to the sink while the dishwasher is running.
Choosing the Right Spot: Positioning Your Dishwasher Near the Sink
Positioning your dishwashers close to the sink is crucial because it minimizes the distance plumbing lines must travel, reducing the risk of leaks and pressure loss. Ideally, the dishwasher should be installed in the cabinet space directly adjacent to the sink. Make sure there’s enough clearance to open the dishwasher door fully and that the water and power lines can be easily routed through the cabinet wall. Also, ensure proper ventilation and accessibility for future maintenance. A well-thought-out placement improves workflow and simplifies installation.
Step-by-Step Guide to Connecting a Dishwasher to a Sink
Step 1: Turn Off Water and Power Supply
Safety comes first. Before starting any installation, make sure to turn off the water supply to the kitchen sink. This usually means shutting off the hot water valve under the sink. Also, cut the power to the dishwasher’s circuit at the breaker box. This prevents any risk of electric shock while working with the wiring and plumbing.
Step 2: Locate the Dishwasher Inlet and Drain Hose
Identify the two main hoses at the back of the dishwasher—the water inlet hose and the drain hose. The inlet hose is typically smaller and connects to the hot water supply, while the drain hose is larger and connects to your sink’s drain system or garbage disposal. Make sure both hoses are long enough to reach their respective connections without stretching or kinking.
Step 3: Install a High Loop or Air Gap
To prevent dirty water from flowing back into your dishwashers, create a high loop in the drain hose. This means securing the hose as high as possible under the sink cabinet before routing it back down to the drain. Alternatively, you can install an air gap on the countertop. Both methods are designed to comply with plumbing codes and provide essential backflow protection.
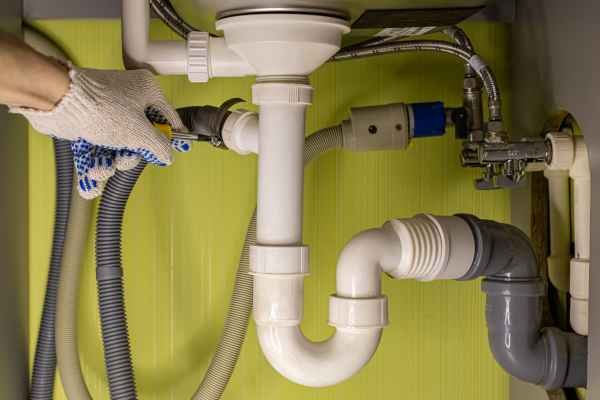
Step 4: Connect the Drain Hose to the Sink Drain or Garbage Disposal
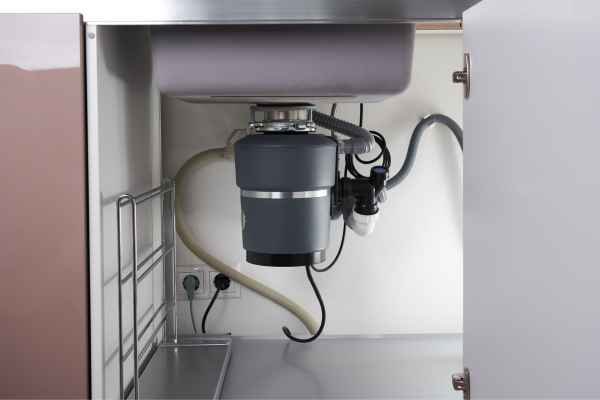
If you’re connecting to a sink drain, use a branch tailpiece with a dishwasher inlet. Slide the hose over the inlet and tighten it using a hose clamp. If connecting to a garbage disposal, remove the knockout plug from the disposal’s inlet port, insert the hose, and secure it with a clamp. Always check that the connection is tight and the hose isn’t twisted or bent.
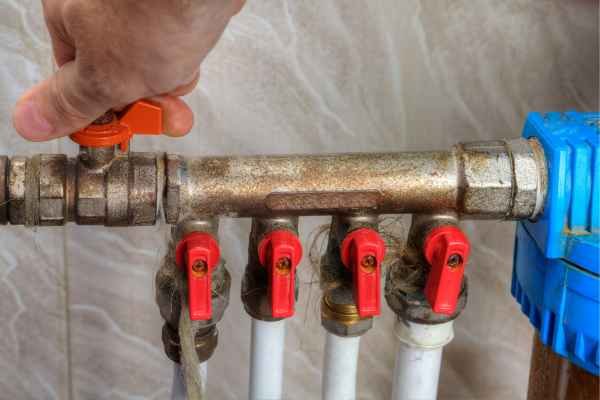
Step 5: Connect the Water Supply Line

Attach the dishwasher’s water inlet line to the hot water valve under the sink using a 90-degree elbow fitting if needed. Use plumber’s tape on threaded fittings to ensure a watertight seal. Tighten with an adjustable wrench, but avoid over-tightening which may damage the fittings. Once connected, open the valve slightly to check for leaks.
Step 6: Secure Electrical Connections (If Needed)
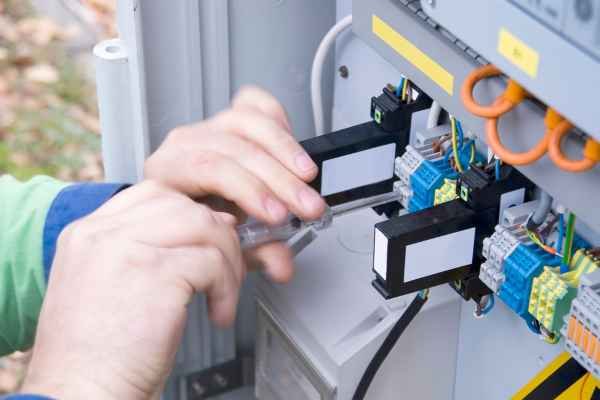
If your dishwasher is hardwired, connect the black (hot), white (neutral), and green (ground) wires according to the manufacturer’s instructions. Use wire nuts and electrical tape for secure connections. If it uses a power cord, simply plug it into a GFCI outlet under the sink. Always double-check that no wires are exposed or loose.
Step 7: Test the Setup for Leaks and Functionality
Turn the water supply back on and restore power at the circuit breaker. Run a short rinse cycle on the dishwasher. Check for leaks at all connection points—especially the water supply and drain hose. Look under the sink and beneath the dishwasher for signs of moisture. If everything is dry and the cycle runs smoothly, the installation is complete.
How to Attach a Dishwasher Drain Hose to the Sink Drainpipe
To attach the drain hose directly to the sink drain, you’ll need a special tailpiece that includes a side inlet. Slide the hose onto the side inlet and secure it with a stainless-steel clamp. Ensure the high loop is in place and the hose slopes downward toward the drain to allow proper water flow. Test for leaks by running water through the sink and observing the hose connection.
How to Use a Garbage Disposal Connection for Dishwasher Drainage
Using a garbage disposal connection is one of the easiest and most common methods. First, knock out the plug inside the disposal’s inlet using a screwdriver and hammer. Insert the dishwasher drain hose into the inlet and secure it with a clamp. Ensure the hose runs in a smooth loop and is supported to prevent sagging. This method is efficient and provides strong suction for draining.
Installing a Faucet Adapter for Portable Dishwashers
If you have a portable dishwasher, connecting it to the sink is quick and non-permanent. Portable models typically use a faucet adapter that screws onto the kitchen faucet, allowing water to flow into the dishwasher during operation. First, remove any aerator from your faucet and screw on the adapter provided with your dishwashers. Attach the dishwasher’s hose assembly to the adapter by pulling down the collar and snapping it in place. Make sure the connection is tight to prevent leaks. After the wash cycle, disconnect the hose, turn off the water, and return the faucet to regular use. This method is ideal for renters or small spaces where permanent installation isn’t feasible.
Common Mistakes to Avoid When Hooking Up Your Dishwasher
Even a small error during installation can cause major issues. One common mistake is skipping the high loop or air gap, which can lead to wastewater backing up into your dishwasher. Another is over-tightening fittings, which can strip threads or crack parts. Using the wrong type of hose clamp or failing to secure connections tightly enough may also cause leaks. Forgetting to remove the knockout plug in the garbage disposal before attaching the drain hose is another frequently overlooked step. Taking your time and double-checking each step can help avoid these common pitfalls.
How to Tell If Your Dishwasher Is Properly Connected
Once installation is complete, the easiest way to know everything is connected correctly is to run a short wash or rinse cycle. If the dishwasher fills and drains properly, the water pressure is steady, and no leaks are visible around the connections, you’re good to go. Also, check under the sink to ensure the drain hose is dry and that water isn’t pooling. Look and listen for any unusual sounds, such as rattling or gurgling, which could indicate a loose hose or blockage.
Safety Tips Every First-Time Installer Should Know
Safety should be your top priority. Always shut off the power at the breaker and the water supply before beginning. Never work with live wires or flowing water. Use a GFCI outlet for plug-in models, and ensure proper grounding for hardwired connections. When drilling or modifying cabinetry, wear safety glasses and gloves. Lastly, check all manufacturer instructions specific to your model—following them reduces the risk of improper installation.
How to Maintain the Dishwasher-Sink Connection for Long-Term Use
Maintaining your setup helps prevent future problems. Periodically inspect the drain hose for signs of wear, clogs, or kinks. Clean the air gap or ensure the high loop is still secured. Tighten any loose hose clamps and look for moisture under the sink that might indicate a slow leak. Also, run a vinegar rinse through your dishwasher once a month to reduce mineral build-up, which can affect both water flow and drainage.
When You Should Call a Plumber Instead of DIY
While many dishwasher installations are DIY-friendly, certain situations call for professional help. If your home doesn’t have a pre-existing water line or drain connection for a dishwasher, installing one can require cutting into pipes or electrical lines. Call a plumber if you encounter leaks you can’t stop, electrical concerns, or find that the drainage isn’t working properly even after troubleshooting. A licensed plumber can ensure everything meets local code and works safely.
Troubleshooting Dishwasher and Sink Connection Issues
If your dishwasher isn’t draining, check that the drain hose isn’t clogged, kinked, or blocked by debris. Ensure the garbage disposal plug was removed if that’s your drainage route. For water supply issues, confirm the valve is fully open and the inlet hose isn’t twisted. If the dishwasher isn’t starting, make sure it’s plugged in and that the circuit breaker hasn’t tripped. Strange noises might indicate trapped air or a loose hose vibrating against the cabinet.
Final Thoughts
Connecting a dishwasher to your sink may seem intimidating at first, but with the right tools, a bit of patience, and a careful step-by-step approach, it’s a manageable project for most homeowners. Whether you’re installing a built-in model or using a portable one, understanding the plumbing basics and following safety practices will lead to a successful setup. And when in doubt—don’t hesitate to call in a professional.