Installing a kitchen sink equipped with both a garbage disposal and a dishwasher might seem complex, but with the right approach, even a beginner can handle the job confidently. Whether you’re upgrading your current setup or building a new one, understanding the process and preparing correctly will save you time, money, and stress. Let’s walk through the essential steps to help you plumb a kitchen sink with disposal and dishwasher like a pro.
Understanding the Basics of Kitchen Plumbing: What You Need to Know First
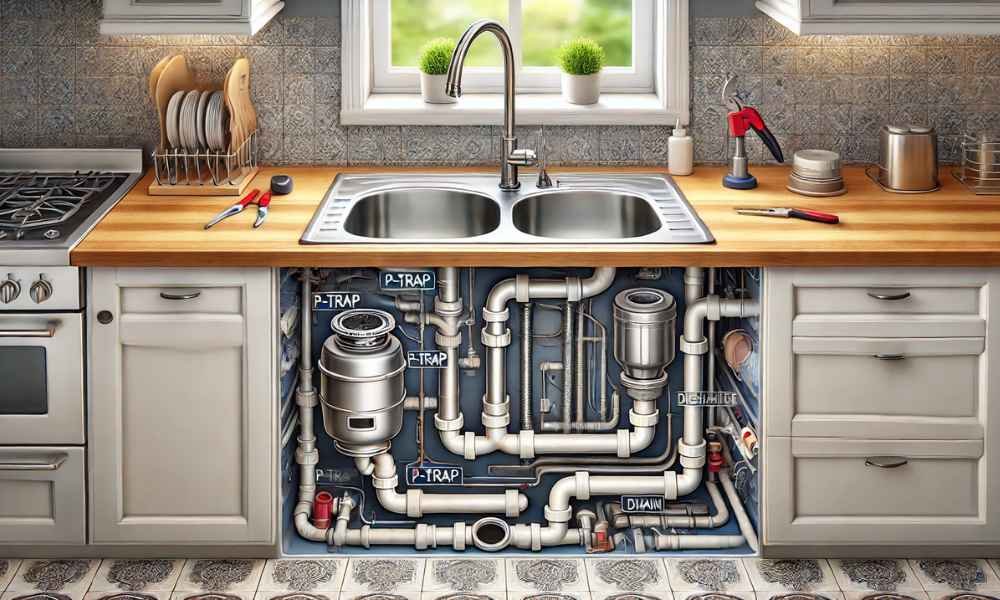
Before diving into installation, it’s crucial to understand the basic components of your kitchen plumbing system. At its core, the system includes hot and cold water supply lines, a waste drain system, and connections for appliances like garbage disposals and dishwashers. Water flows into the sink from the supply lines and exits through the drain pipes, which include a P-trap and a main drainage connection. The garbage disposal grinds food waste before it enters the drain, and the dishwasher empties its dirty water through a connected hose. Knowing how these components interact sets the stage for a smooth and successful plumbing project.
Essential Tools and Materials for Installing a Sink, Disposal, and Dishwasher
Having the right tools and supplies on hand will make your installation faster and easier. You’ll need adjustable wrenches, channel-lock pliers, a pipe wrench, plumber’s putty, Teflon tape, a screwdriver set, and a bucket to catch any water. For materials, gather a P-trap kit, PVC drain pipes and elbows, hose clamps, a garbage disposal unit, a dishwasher drain hose, and flexible water supply lines. A power drill and a level will also come in handy for precise installation. Being well-prepared with the correct items will prevent unnecessary trips to the hardware store mid-project.
Planning Your Plumbing Layout for Maximum Efficiency
Thoughtful planning is key when connecting multiple appliances to your sink’s plumbing. Start by identifying the best position for your garbage disposal—typically under one side of a double-basin sink. The dishwasher should be located adjacent to the sink cabinet to simplify hose connections. Ensure your drainpipes are aligned properly and that your P-trap has enough space to fit between the sink and wall drain. A clean and logical layout not only ensures better performance but also simplifies future maintenance. Plumb A Kitchen Sink With Disposal And Dishwasher.
Safety First: Precautions Before You Start the Plumbing Work
Safety should always be your top priority when working with plumbing and electrical components. Start by wearing gloves and safety goggles to protect your hands and eyes from sharp tools and debris. Make sure to unplug the garbage disposal if it’s already connected, and avoid working in wet conditions to reduce the risk of electrical shock. Keep your workspace well-lit and organized, and avoid rushing through any step of the installation. Taking these precautions will help you work more confidently and avoid injuries or mistakes.
Turning Off Water Supply and Power: A Step You Can’t Skip
Before you begin removing or installing anything, you must shut off the water and electricity. Locate the hot and cold water shut-off valves under the sink and turn them clockwise until they are fully closed. If you don’t have local shut-offs, you may need to shut off the main water supply to the house. Next, switch off the power supply to the garbage disposal and dishwasher at the circuit breaker. This step is essential for avoiding flooding And electric shock, Making it one of the most critical parts Of the prep process. Plumb A Kitchen Sink With Disposal And Dishwasher.
How to Remove the Old Sink Plumbing (If Applicable)
If you’re replacing an existing setup, begin by placing a bucket underneath the sink to catch any remaining water. Use pliers or a wrench to loosen the slip nuts on the P-trap and disconnect it from the sink’s tailpiece and wall drain. Remove the old garbage disposal by unlocking it from the mounting assembly and unplugging its power cord. Unscrew the dishwasher drain hose from the disposal or air gap fitting. Finally, disconnect the water supply lines from the faucet. Carefully remove all outdated components to clear the way for a fresh installation.
Installing the Kitchen Sink: Step-by-Step Instructions
Step 1: Prepare the Cabinet and Plumbing
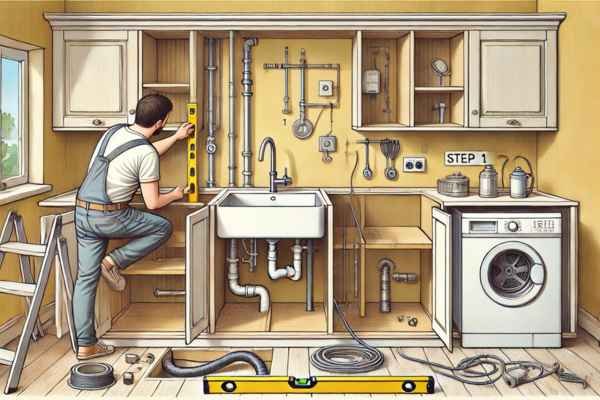
Start by clearing out the sink base cabinet and checking that it’s level and free from damage. Measure the sink cutout carefully and adjust if necessary. Remove old plumbing or fixtures if replacing an existing sink. Ensure water supply lines, a waste outlet, and an electrical outlet for the garbage disposal are present. If a dishwasher is included, confirm the drain hose and power supply can reach. This preparation step ensures that everything is aligned and ready for installation, avoiding delays or mid-project fixes. Plumb A Kitchen Sink With Disposal And Dishwasher.
Step 2: Install the Sink and Faucet

Apply a bead of plumber’s putty or silicone around the sink’s edge, then place it into the countertop opening. Secure it using mounting clips from underneath. Install the faucet and any accessories while access is easy. Thread supply lines through the cabinet and tighten mounting nuts. Connect the water lines to the shut-off valves, and check that everything sits securely. This step ensures a solid seal and sets the stage for smooth plumbing connections later. Plumb A Kitchen Sink With Disposal And Dishwasher.
Step 3: Mount the Disposal and Connect Dishwasher
Attach the garbage disposal to the sink flange using the mounting ring system. Don’t forget to remove the knockout plug if connecting a dishwasher. Attach the dishwasher’s drain hose to the disposal and clamp it securely. Create a high loop in the hose to prevent backflow or install an air gap if required. Make the electrical connection by plugging into a GFCI outlet or wiring to a switch. This step links your disposal and dishwasher to the system safely.
Step 4: Finish Drain Connections and Test
Assemble the drainpipes under the sink using the tailpiece, T-fitting, and P-trap. Tighten compression nuts securely but don’t overtighten. Once everything is connected, turn on the water and check for leaks around the drain and faucet. Run the garbage disposal and start a short dishwasher cycle to test both functions. If all works correctly, clean any sealant around the sink and restore the cabinet space. You’ve now installed a fully functional kitchen sink setup.
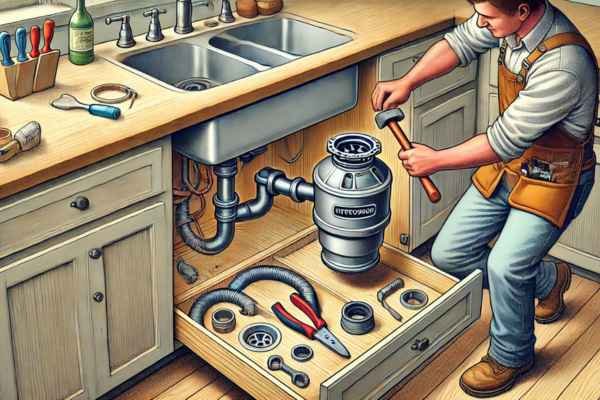
Mounting the Garbage Disposal Unit Under the Sink
Once the sink is securely in place, it’s time to mount the garbage disposal—a task that might look intimidating but becomes simple when broken down into steps. Start by attaching the mounting assembly to the sink’s drain flange. Most garbage disposals come with a three-bolt or EZ mount system. Apply plumber’s putty around the flange and insert it into the drain opening. From underneath, secure it with the gasket and mounting ring, tightening the screws evenly to create a strong seal.
Next, if your dishwasher will be connected to the disposal, locate the small plug inside the dishwasher inlet port and knock it out using a screwdriver and hammer. Remove the plug debris to avoid future clogs. Now lift the disposal up and align it with the mounting ring. Twist it into place until it locks securely. If you’re using a corded unit, plug it into a GFCI outlet; otherwise, make sure to connect it to its dedicated circuit following local electrical codes. Give the unit a gentle shake to confirm it’s firmly attached. Plumb A Kitchen Sink With Disposal And Dishwasher.
How to Connect the Dishwasher Drain Hose to the Garbage Disposal
The dishwasher expels dirty water through a drain hose, which must be routed into the garbage disposal or an air gap, depending on local plumbing codes. If you’re connecting directly to the disposal, slide the hose over the disposal’s inlet and secure it with a stainless steel hose clamp. Make sure the connection is tight and the hose is looped upward—this prevents backflow and ensures proper drainage.
In some areas, you may need to install an air gap—a small device mounted on the sink or countertop that separates clean and dirty water pathways. To do this, attach the dishwasher hose to the air gap’s inlet, then run a second hose from the air gap’s outlet to the disposal’s inlet. Whichever method you choose, make sure the hose is kink-free and angled downward for smooth water flow.
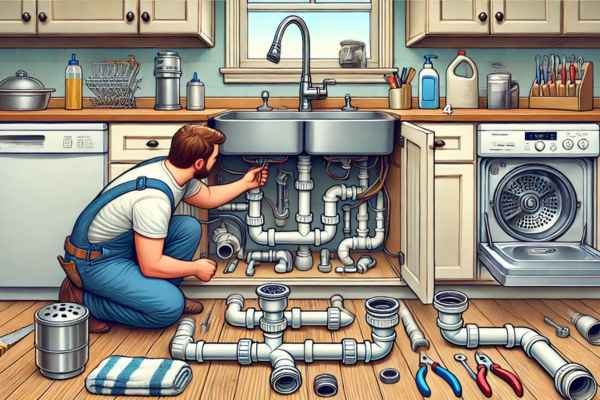
Installing the Trap Assembly and Drain Pipes Correctly
Now it’s time to install the P-trap and drain assembly, which will direct waste water away from the sink. Begin by connecting a tailpiece to the sink strainer (or directly to the garbage disposal’s discharge pipe). Then, attach the curved trap arm using slip nuts and washers. The trap’s U-shape is vital—it holds water to block sewer gases from backing up into your kitchen.
Ensure that the horizontal trap arm slopes slightly downward toward the wall drain—about ¼ inch per foot is ideal. Tighten all slip nuts hand-tight, then give each a gentle turn with pliers for a snug fit. Avoid overtightening, which can crack PVC parts. Once assembled, the system should have no sagging, and every connection should be secure without cross-threading.
How to Connect the Hot and Cold Water Supply Lines
To supply your sink faucet and dishwasher with water, you’ll need to hook up the hot and cold supply lines. Begin by connecting flexible braided hoses from the faucet’s hot and cold stems to the shut-off valves under the sink. Wrap Teflon tape around the male threads for a watertight seal, then hand-tighten the fittings before giving them a final snug with a wrench.
For the dishwasher, you’ll typically connect it to the hot water line. Install a dual-outlet shut-off valve or a tee fitting so both the faucet and dishwasher can draw from the same source. Use the manufacturer-supplied dishwasher water line and make sure it’s rated for high temperatures. Once attached, double-check that there are no kinks or tight bends that could restrict water flow.
Testing for Leaks and Ensuring Proper Water Flow
With everything connected, it’s time for the moment of truth—testing. Slowly turn on the hot and cold water valves and check all joints for any signs of dripping. Start from the supply lines, move down to the faucet, trap assembly, and garbage disposal. If you spot a leak, gently tighten the connection or reapply Teflon tape if necessary.
Plug the sink drain and fill the basin with water, then release it and observe the drain system under pressure. This helps identify leaks that may not show during a simple trickle. Run the dishwasher through a short rinse cycle and activate the garbage disposal to ensure both are draining properly and running smoothly. If everything checks out, your kitchen plumbing setup is ready to go—efficient, clean, and worry-free.
Troubleshooting Common Installation Issues (Leaking, Clogs, Vibration)
Even the most careful installation can run into hiccups. One of the most frequent problems is leaking—usually due to loose connections, worn gaskets, or misaligned pipes. Inspect all fittings and retighten slip nuts where needed. For threaded connections, wrap joints with plumber’s tape to create a better seal. Clogs often occur if debris enters the drain line during installation or if the dishwasher knockout plug wasn’t removed. Clear out the P-trap and double-check that the knockout plug inside the disposal’s dishwasher inlet is properly dislodged. Vibration from the garbage disposal can indicate loose mounting or an unbalanced impeller inside the unit. Recheck the mounting ring and tighten screws, and if shaking continues, inspect the disposal for trapped debris or contact the manufacturer for support.
Understanding Air Gaps vs High Loops for Dishwasher Drainage
Preventing backflow from the sink into your dishwasher is essential. There are two common solutions: air gaps and high loops. An air gap is a metal or plastic fitting installed above the sink or countertop that creates a physical separation between the dishwasher’s drain line and the disposal. It’s the most reliable method and required by many local building codes. On the other hand, a high loop involves routing the dishwasher hose up to the underside of the countertop before it descends into the disposal inlet. This method relies on gravity and can prevent back siphoning in areas where air gaps aren’t mandated. While both methods are effective, air gaps offer more protection and are highly recommended for homes with frequent heavy dishwasher use.
Tips for Maintaining Your Sink, Disposal, And Dishwasher Setup
Routine maintenance goes A long way in extending the life of Your kitchen plumbing setup. Always run cold water before and after using the garbage disposal to flush out debris and keep the motor cool. Avoid grinding fibrous vegetables, coffee grounds, or grease—they’re notorious for causing clogs. For the dishwasher, clean the filter monthly and inspect the spray arms for blockages. Occasionally run a cleaning cycle with white vinegar or a dishwasher cleaner to break down soap scum and food particles. Keep your sink drains fresh by pouring baking soda followed by vinegar down the drain every few weeks. These simple practices will help your plumbing run smoothly for years.
When to Call a Professional Plumber (And When You Probably Don’t Need To)
While many homeowners can handle the installation themselves, some situations call for expert help. If you’re working with outdated plumbing, encountering persistent leaks, or dealing with complex electrical hookups, it’s wise to contact a licensed plumber. Additionally, if local code requirements are unclear—particularly regarding air gaps or electrical circuits—a professional can ensure compliance. That said, if your setup involves straightforward connections, new parts, and basic tools, DIY installation is often safe and cost-effective.
Final Checklist Before Using Your New Kitchen Setup
Before you turn on your faucet and load your first dishwasher cycle, take a moment to go through a quick checklist:
- All supply lines are tightly connected
- Drain pipes are properly sealed with no visible leaks
- Garbage disposal is securely mounted and running quietly
- Dishwasher drain hose is properly routed and clamped
- Water flows smoothly from both hot and cold faucets
- Disposal and dishwasher both drain without backup or overflow
Completing this checklist gives you peace of mind that your system is safe, functional, and ready for daily use.
Eco-Friendly Tips to Improve Your Kitchen Plumbing System
Sustainability begins with small changes in your plumbing habits. Install low-flow faucet aerators to reduce water usage without sacrificing performance. Opt for an Energy Star-rated dishwasher that uses less water and electricity per cycle. Compost organic waste instead of relying heavily on your garbage disposal—it reduces strain on your plumbing and benefits the environment. Regularly check for slow leaks or dripping faucets to conserve water and avoid costly utility bills. These eco-conscious upgrades not only protect the planet but Also make your kitchen setup more efficient and cost-effective in the long run.