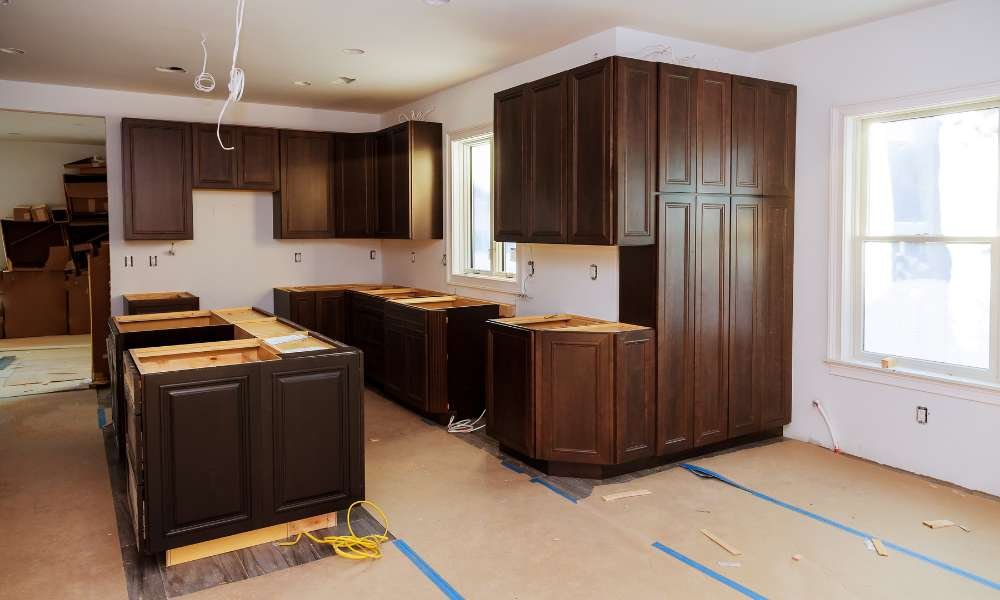
Sanding kitchen cabinets may not be the most glamorous task in a home improvement project, but it’s undoubtedly one of the most critical. Whether you’re breathing new life into old cabinets with a fresh coat of paint or prepping them for a full refinish, proper sanding is the key to a smooth, durable, and professional-looking finish. This guide will walk you through the entire process—step by step—so you can tackle this task with confidence and precision.
Understanding Why Sanding Kitchen Cabinets Is Essential Before Painting or Refinishing
Sanding isn’t just about aesthetics—it’s about preparation. Cabinets, over time, collect layers of grease, old finish, and microscopic imperfections. If you skip the sanding process, paint or stain won’t adhere properly, leading to peeling, bubbling, or blotchy results. Sanding evens out the surface, removes previous coatings, and opens up the wood grain to absorb new finishes effectively. It’s the foundation upon which your cabinet makeover is built.
Tools and Materials You’ll Need to Sand Kitchen Cabinets Properly
Having the right tools can turn a tedious job into a smooth process. For this task, you’ll need:
- An electric orbital sander (ideal for flat surfaces)
- Sanding blocks or sponges for detailed areas
- Assorted sandpapers (usually in grits ranging from 60 to 220)
- Drop cloths or plastic sheeting
- Painter’s tape
- Screwdrivers for removing hardware
- Safety gear (goggles, dust mask, gloves)
- Vacuum or tack cloths for dust removal
These tools streamline your workflow and help achieve a professional-grade result even if you’re a beginner.
Choosing the Right Type of Sandpaper for Kitchen Cabinets
The success of your sanding job depends heavily on the sandpaper you choose. Each type serves a distinct purpose, depending on your cabinets’ material, the current finish, and the final look you aim to achieve.
Grit Levels Explained
Grit refers to the coarseness of the sandpaper. Lower numbers mean rougher grit, suitable for stripping finishes, while higher numbers are smoother, intended for final polishing.
- 60–80 grit: Very coarse, used for removing heavy finishes or paint
- 100–150 grit: Medium grit, perfect for evening surfaces
- 180–220 grit: Fine grit, ideal for final sanding before painting
Understanding grit levels ensures you progress through sanding stages efficiently, avoiding unnecessary scratches or rough patches.
When to Use Each Type
- Use coarse grit for the initial pass if the cabinets have a thick layer of paint or varnish.
- Follow with medium grit to smooth out roughness created by the coarse paper.
- Finish with fine grit to prepare the surface for a flawless paint or stain application.
- For touch-ups or sensitive areas, opt for sanding sponges or flexible pads.
Prepping Your Kitchen Space for a Smooth and Dust-Free Sanding Process
Before the sanding begins, protect your kitchen from dust chaos. Lay down drop cloths and tape off surrounding walls, countertops, and appliances. Turn off HVAC systems to prevent dust from spreading throughout the house. If possible, work in a well-ventilated area or use a dust extraction system. These precautions make cleanup easier and maintain a safer working environment.
Removing Cabinet Doors, Drawers, and Hardware for Easier Access
Trying to sand cabinets with the doors still attached is inefficient and messy. Use a screwdriver to detach all doors, drawer fronts, and hardware. Label each part and place screws in labeled bags to make reassembly effortless. Working on a flat surface allows for more control and consistent pressure during sanding.
Cleaning Cabinets Before Sanding: Why It Matters More Than You Think
Kitchen cabinets are often coated with layers of grease, dust, and cooking residues. Sanding over dirt can grind contaminants deeper into the wood, compromising the finish. Use a degreasing cleaner or a solution of vinegar and warm water to thoroughly wipe down all surfaces. Allow them to dry completely before proceeding.
How to Sand Kitchen Cabinets Step by Step
Step 1: Start with a Coarse Grit for Removing Old Finish
Begin by using 60–80 grit sandpaper or an electric sander to remove old paint, varnish, or lacquer. Use long, even strokes, following the direction of the wood grain. Don’t rush—focus on consistency rather than speed.
Step 2: Sand with Medium Grit for a Smooth Transition
Switch to 120–150 grit paper. This step smooths out any deep scratches left by the coarse grit and prepares the surface for finer sanding. At this stage, the wood should feel soft to the touch but not polished.
Step 3: Finish with Fine Grit for a Polished Surface
Now move on to 180–220 grit for the final sanding pass. This step creates a silky texture and opens the wood pores for better adhesion of paint or stain. A smooth surface ensures even absorption and reduces the risk of visible brush marks.
Step 4: Clean Up Dust Between Each Stage
After each grit level, remove all dust with a vacuum and tack cloth. Residual dust can cause imperfections in the final finish and reduce adhesion quality.
Common Mistakes to Avoid When Sanding Kitchen Cabinets
Avoid pressing too hard with a sander, as it can create uneven surfaces or gouges. Skipping grit levels may save time but often results in a poor finish. Never sand across the wood grain—this creates scratches that are difficult to hide. And above all, never start painting without thoroughly cleaning off sanding dust.
When to Use a Hand Sander vs. a Sanding Block or Sponge
An orbital sander is excellent for large, flat surfaces like cabinet doors. However, for corners, bevels, and moldings, hand sanding with a sponge or block provides better control. For curved or intricate details, flexible sanding pads adapt to complex contours more effectively.
How to Deal with Stubborn Spots, Grooves, and Ornate Details
For areas with deep grooves or carved embellishments, use folded sandpaper, sanding sponges, or detail sanding tools. Be patient—rushing may damage the wood or leave finish behind. If buildup remains, consider a chemical stripper applied carefully with a brush.
Sanding Between Coats: Is It Necessary and How to Do It Right
If you’re applying multiple coats of paint or stain, sanding between coats is essential for a smooth finish. Use 220–320 grit paper to gently buff the dried layer, then remove dust with a tack cloth. This step helps each layer adhere better and eliminates tiny imperfections or bubbles.
Final Touches After Sanding: What to Do Before Painting or Staining
After your final sanding pass, clean all surfaces thoroughly. Use a vacuum, tack cloths, and even a damp rag for final cleanup. Let the wood dry completely. Check for any rough spots or blemishes. Only when the surface feels smooth and clean should you begin the painting or staining process.
Safety Tips While Sanding Cabinets: Protecting Yourself and Your Home
Wear a dust mask or respirator to avoid inhaling particles, especially when dealing with old paint that may contain lead. Safety goggles protect your eyes from flying debris. Use gloves to avoid skin irritation. Always sand in a well-ventilated area or use a fan to disperse dust.
How Long Does It Take to Sand Kitchen Cabinets and What to Expect
Sanding a full kitchen’s worth of cabinets can take anywhere from 4 to 10 hours depending on size, surface area, and your level of experience. Intricate designs or previous heavy finishes can add time. It’s a labor-intensive job, but the reward—a beautifully finished kitchen—is well worth the effort.